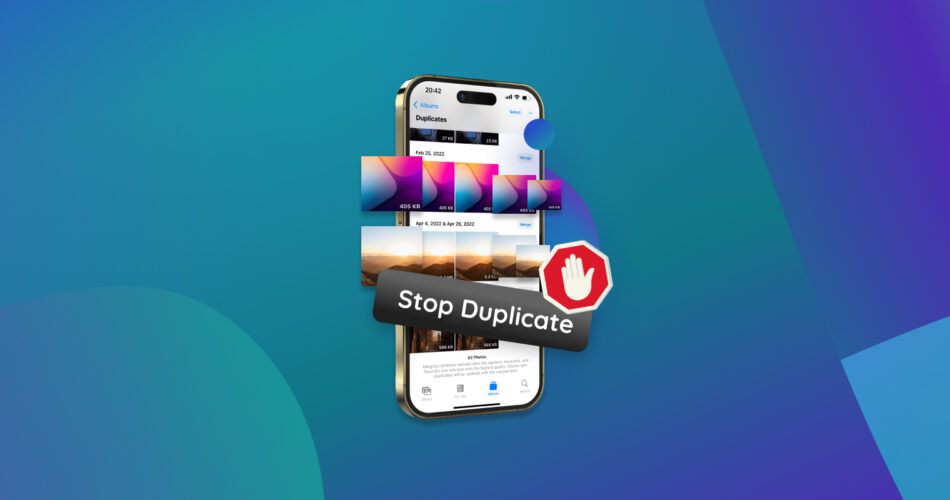
Tired of seeing duplicate photos cluttering your iPhone’s storage? These can take up a lot of space and make it difficult to manage your image library. We will show you several (5 to be exact) methods you can use to put this problem behind you. Let’s start.
These methods will stop new duplicates from appearing, but some won’t remove the ones already in your library. If you want to clean up existing duplicates, check out How to Get Rid of Duplicate (And Similar) Photos.
Why Do Duplicate iPhone Photos Appear?
Duplicate photos can sneak into your iPhone for various reasons:
- 🧷 Manual/accidental duplication: There are instances that you accidentally create duplicate photos by tapping the capture button repeatedly or saving an image multiple times.
- 📦 Importing from multiple sources: Importing photos from different devices or services can lead to duplicates if not appropriately managed.
- 💾 Restoring from backups: Restoring your iPhone from a backup might reintroduce duplicate photos if the backup contains such copies.
- 📲 Third-party app usage: Using third-party photo editing or management apps can result in duplicate images, especially when saving edited versions alongside with the original version.
- 💥 Burst mode: When you take photos in burst mode, this can result in multiple similar shots being saved on your iPhone, some of which might be considered duplicates.
How to Stop Your iPhone from Duplicating Photos
Now, let’s start with the methods. Some of them are settings you can change to stop duplicates from appearing, while others are practices you’ll need to adopt to keep your library clean.
Method 1: Avoid Burst Mode
We already mentioned Burst Mode and want to reiterate it because many people forget that these are also duplicates. While burst photos don’t show up as separate images in your Photos library, they still take up unnecessary space.
So, unless you actually need multiple frames to capture the perfect moment, Burst Mode isn’t worth it. To avoid bursts in the future, change your settings so holding the shutter button won’t trigger the burst mode:
- Go to Settings > Camera.
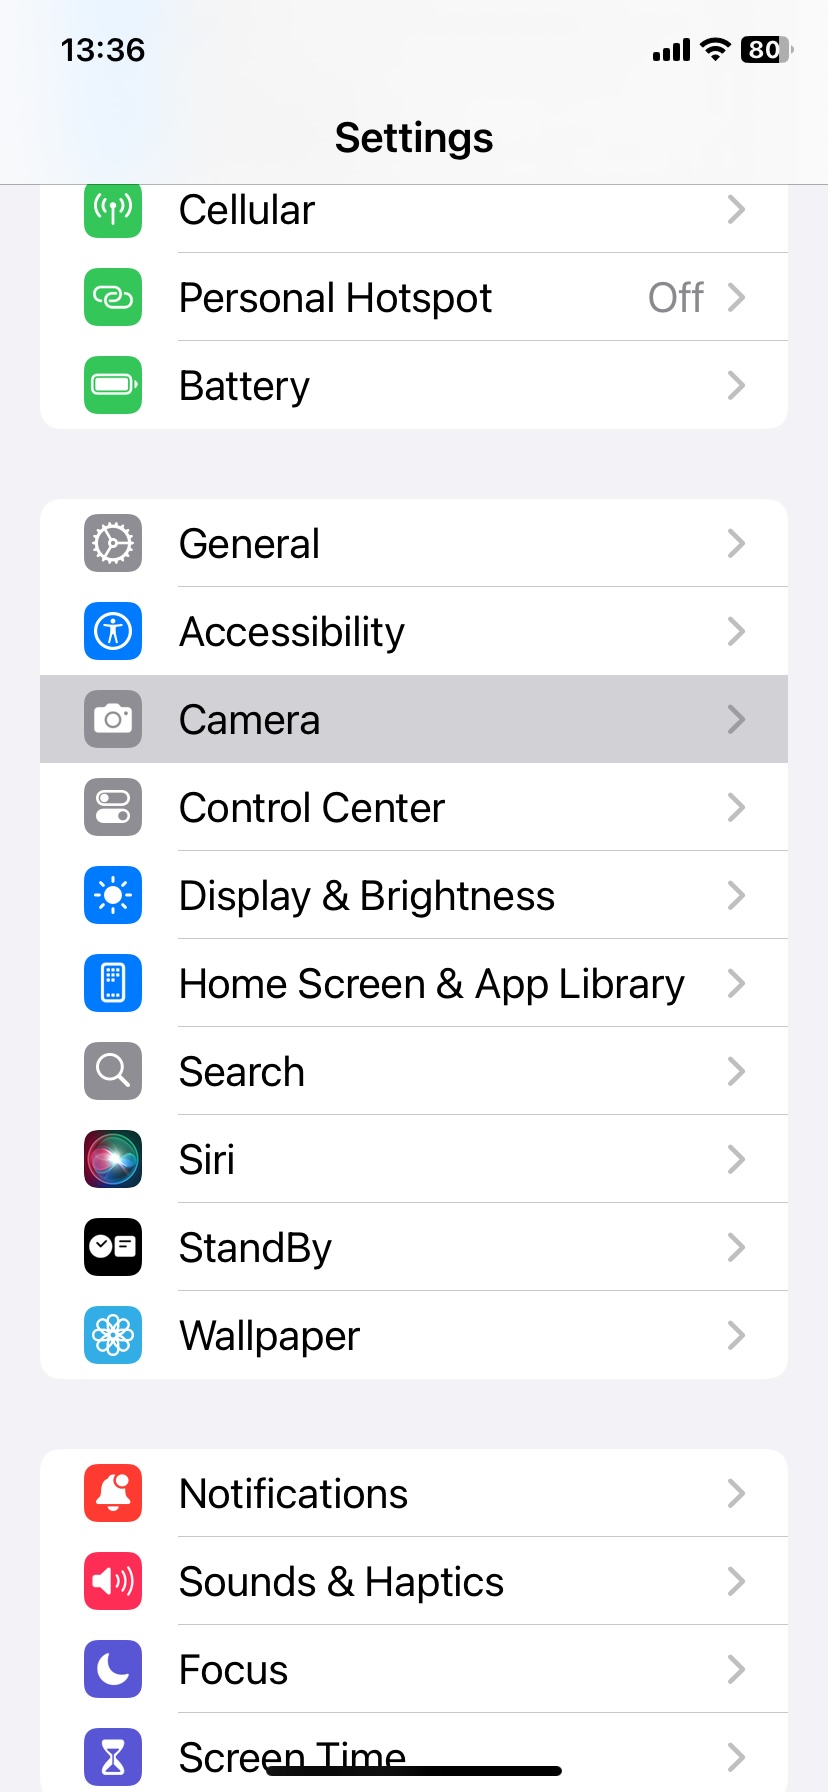
- Turn off Use Volume Up for Burst.
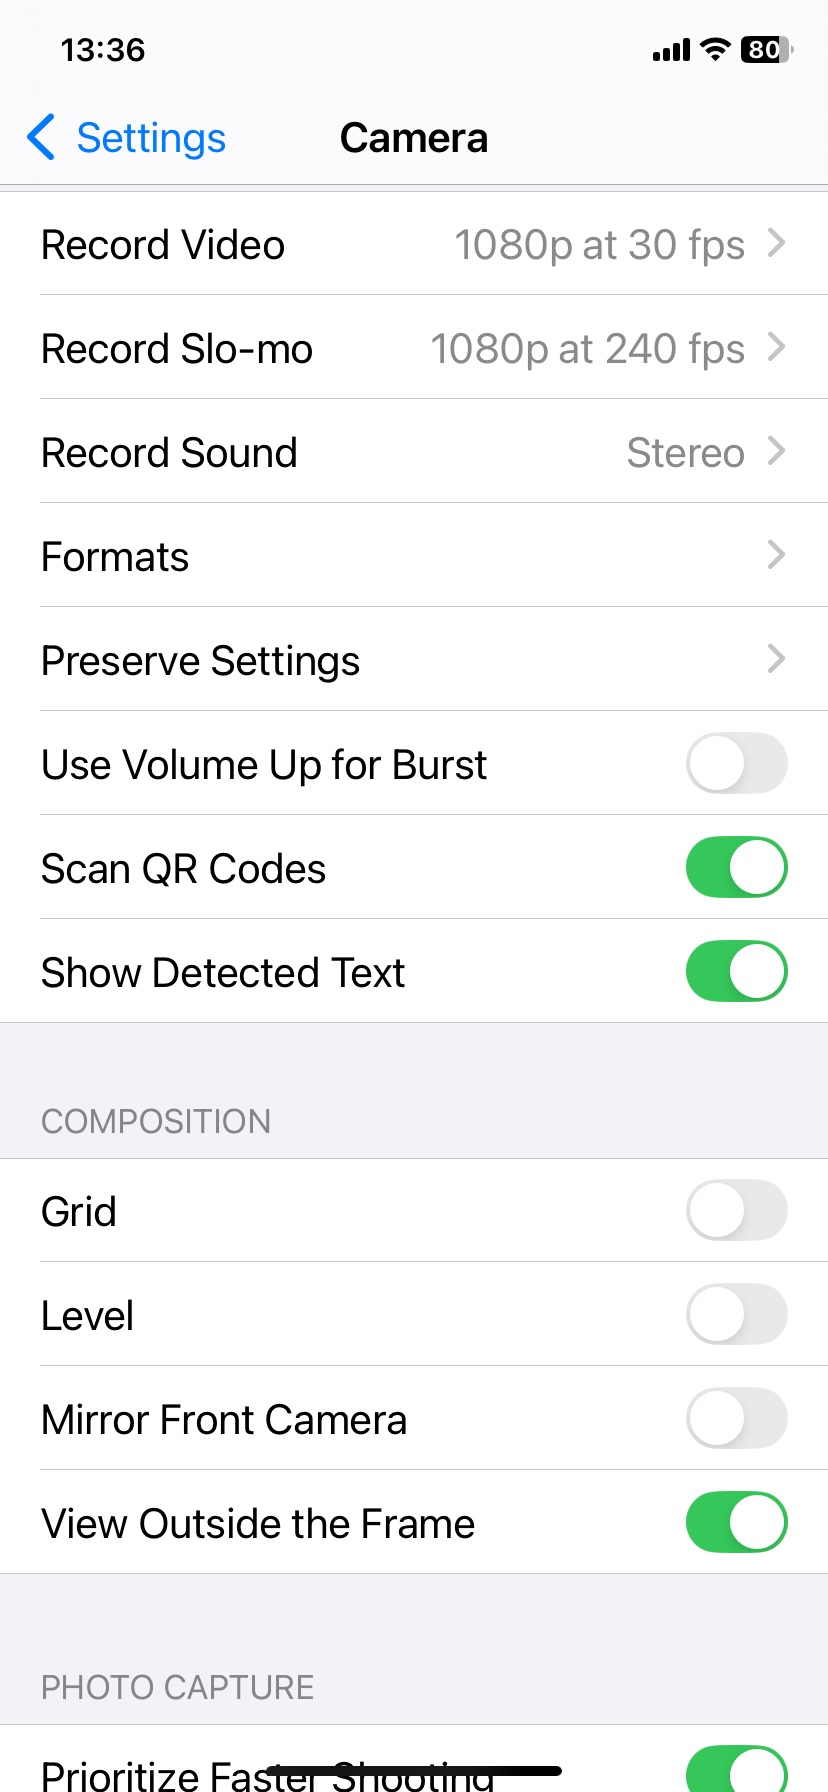
Now, when you hold the shutter button, it will start recording video instead of a burst. If you ever want Burst Mode back, just toggle it back on.
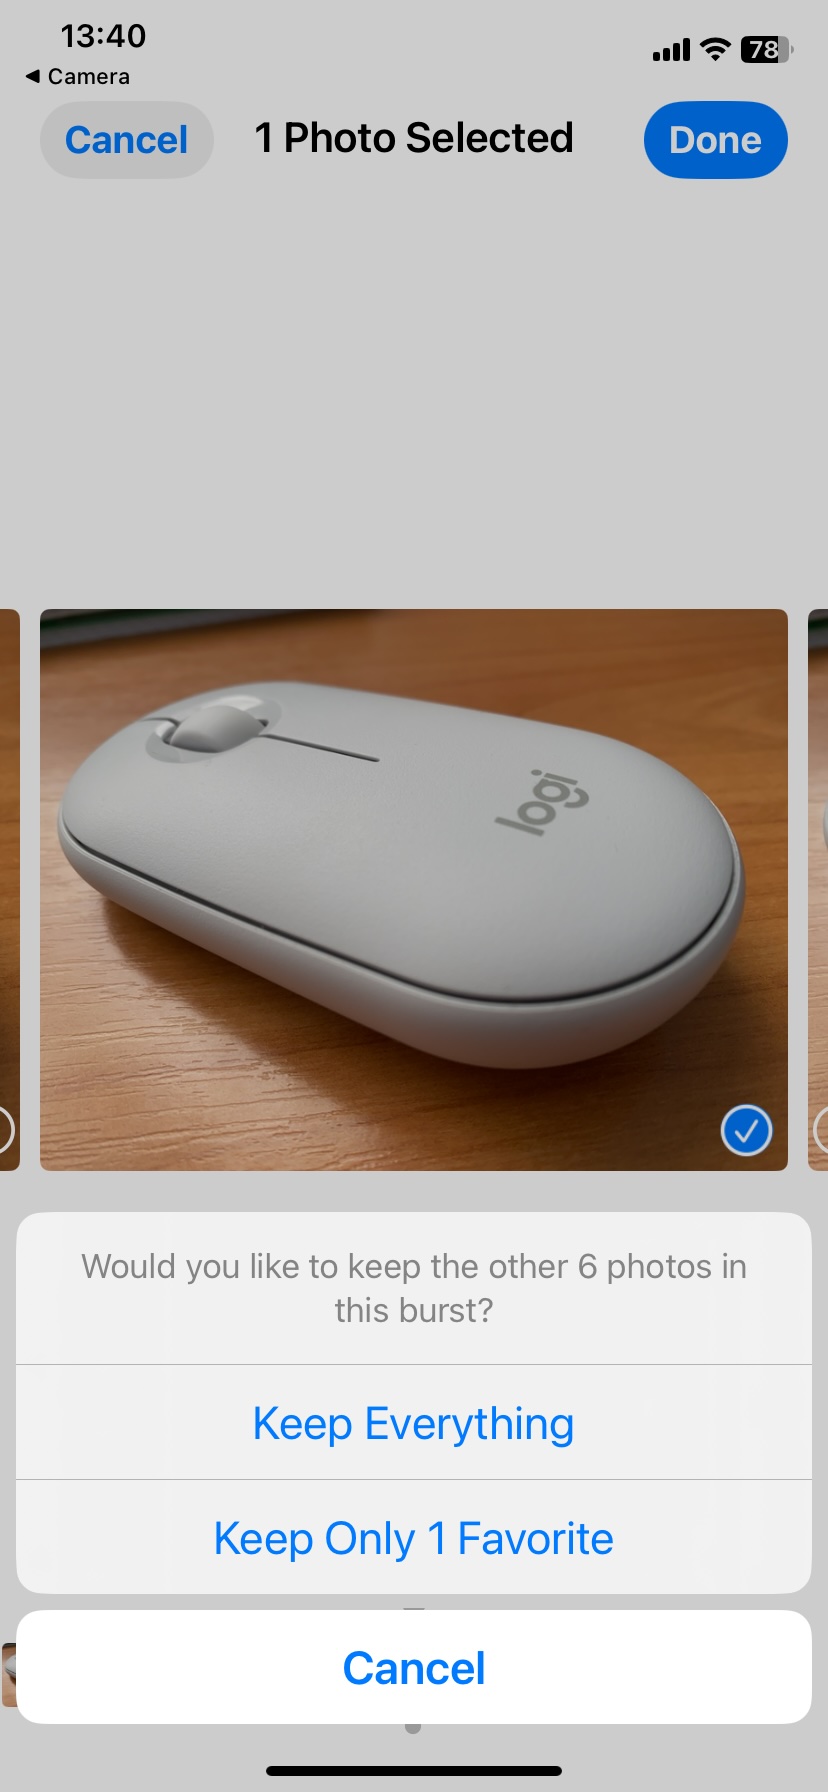
If you already have burst sequences saved:
- Open the Photos app.
- Find a burst photo set.
- Tap on Burst(n), a small stacked icon.
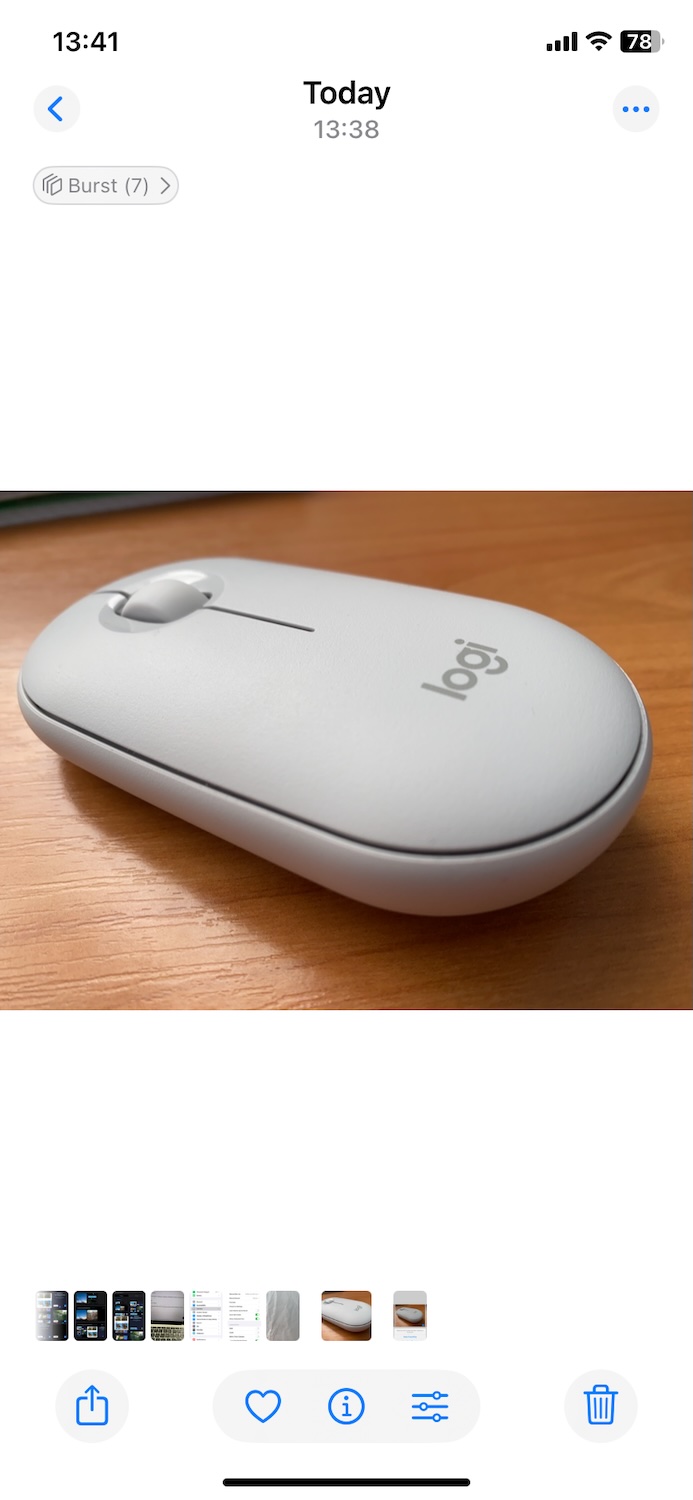
- Choose the best shot and tap Done.
- Select Keep Only 1 Favorite.
Method 2: Turn Off Auto HDR
HDR is an iPhone feature that takes several photos in different exposures and blend them together. This is turned on by default. But if you want to turn it off, you can definitely do so.
Note: Starting with the iPhone 13 and subsequent models, the ability to manually turn off HDR for photos directly from the camera settings has been removed. However, you can still manage HDR settings for already captured photos by navigating to Settings > Photos.
For iPhone XS, XR, 11, SE (2nd generation), and iPhone 12:
- Open the Settings app on your iPhone.
- Scroll down and tap on Camera.

- Toggle off Smart HDR.

For older iPhones such as iPhone 8, 8 Plus, and X:
- Open the Settings app on your iPhone.
- Scroll down and tap on Camera.
- Toggle off Auto HDR.
Additional Note: for iPhone X and older, you can save the non-HDR version. Just go to Settings > Camera > turn on Keep Normal Photo. However, this is not recommended especially if you want to save up on storage.
Method 3: Don’t Save Original Photos After Editing
When you edit a photo on using the Photos app, your iPhone will replace the original photo with the edited version instead of keeping a copy of both. But, you can always revert back to original.
However, if you edit the photo using third-party apps, that can lead to creation of duplicate images stored on your camera roll. Often times, third-party apps don’t replace the original photos by the edited version so you have to manually delete the original photos after editing. But, you can also check the settings of the third-party photo editing app that you’re using to see if there’s an option to fix the problem with duplicating photos.
To manually delete the original photos after editing, do the following steps:
- Go to Photos.
- Look for the original photo that was edited.
- Select the photo and tap the trash can icon on the lower-left part of the screen.
Additionally, you can also check if iPhone marked the images as duplicates. iPhone will tag photos under Duplicates folder if they are copies with different metadata.
To view, do the following steps:
- Open Photos app.
- Under Utilities, click Duplicates.
- Click Merge.

- Then, click Merge Exact Copies to confirm.

Method 4: Avoid Using Multiple Sync & Backup Methods
If you use multiple backup services, they can create duplicates by uploading the same photos separately. For example, if you have iCloud Photos enabled and also use Google Photos, or Dropbox, each service might save its own copy of your images—sometimes even re-uploading files that already exist in your library.
This happens because different apps handle metadata differently, which makes them think a photo is “new” when it’s actually the same file. Some services even compress or slightly alter the image, which causes your iPhone to recognize it as a different version.
Here is what you can do:
- Turn off auto-upload in extra apps – If iCloud Photos is already backing up your photos, disable auto-upload in Google Photos, or Dropbox.
- Use one backup method per device – If your iPhone syncs with iCloud Photos, consider backing up your photos to an external drive or a single cloud service from your Mac or PC instead of letting multiple apps sync directly from your phone.
- Check Your Backup Folders – Some apps create separate folders for each backup session, which might lead to duplicate copies of the same photos. Go through your backup storage occasionally and clear out unnecessary files.
Method 5: Backup Your Photos Manually
Backing up your photos manually on your computer or external hard drive instead of using automatic synchronization can sometimes help stop iPhone from duplicating photos.
Here’s how to do it:
- Connect your iPhone to your computer using a USB cable.
- Launch a File Explorer (Windows) or Finder (Mac). Open the appropriate file management tool on your computer.
- In the file explorer or Finder, locate and select your iPhone’s name under Devices or Locations.
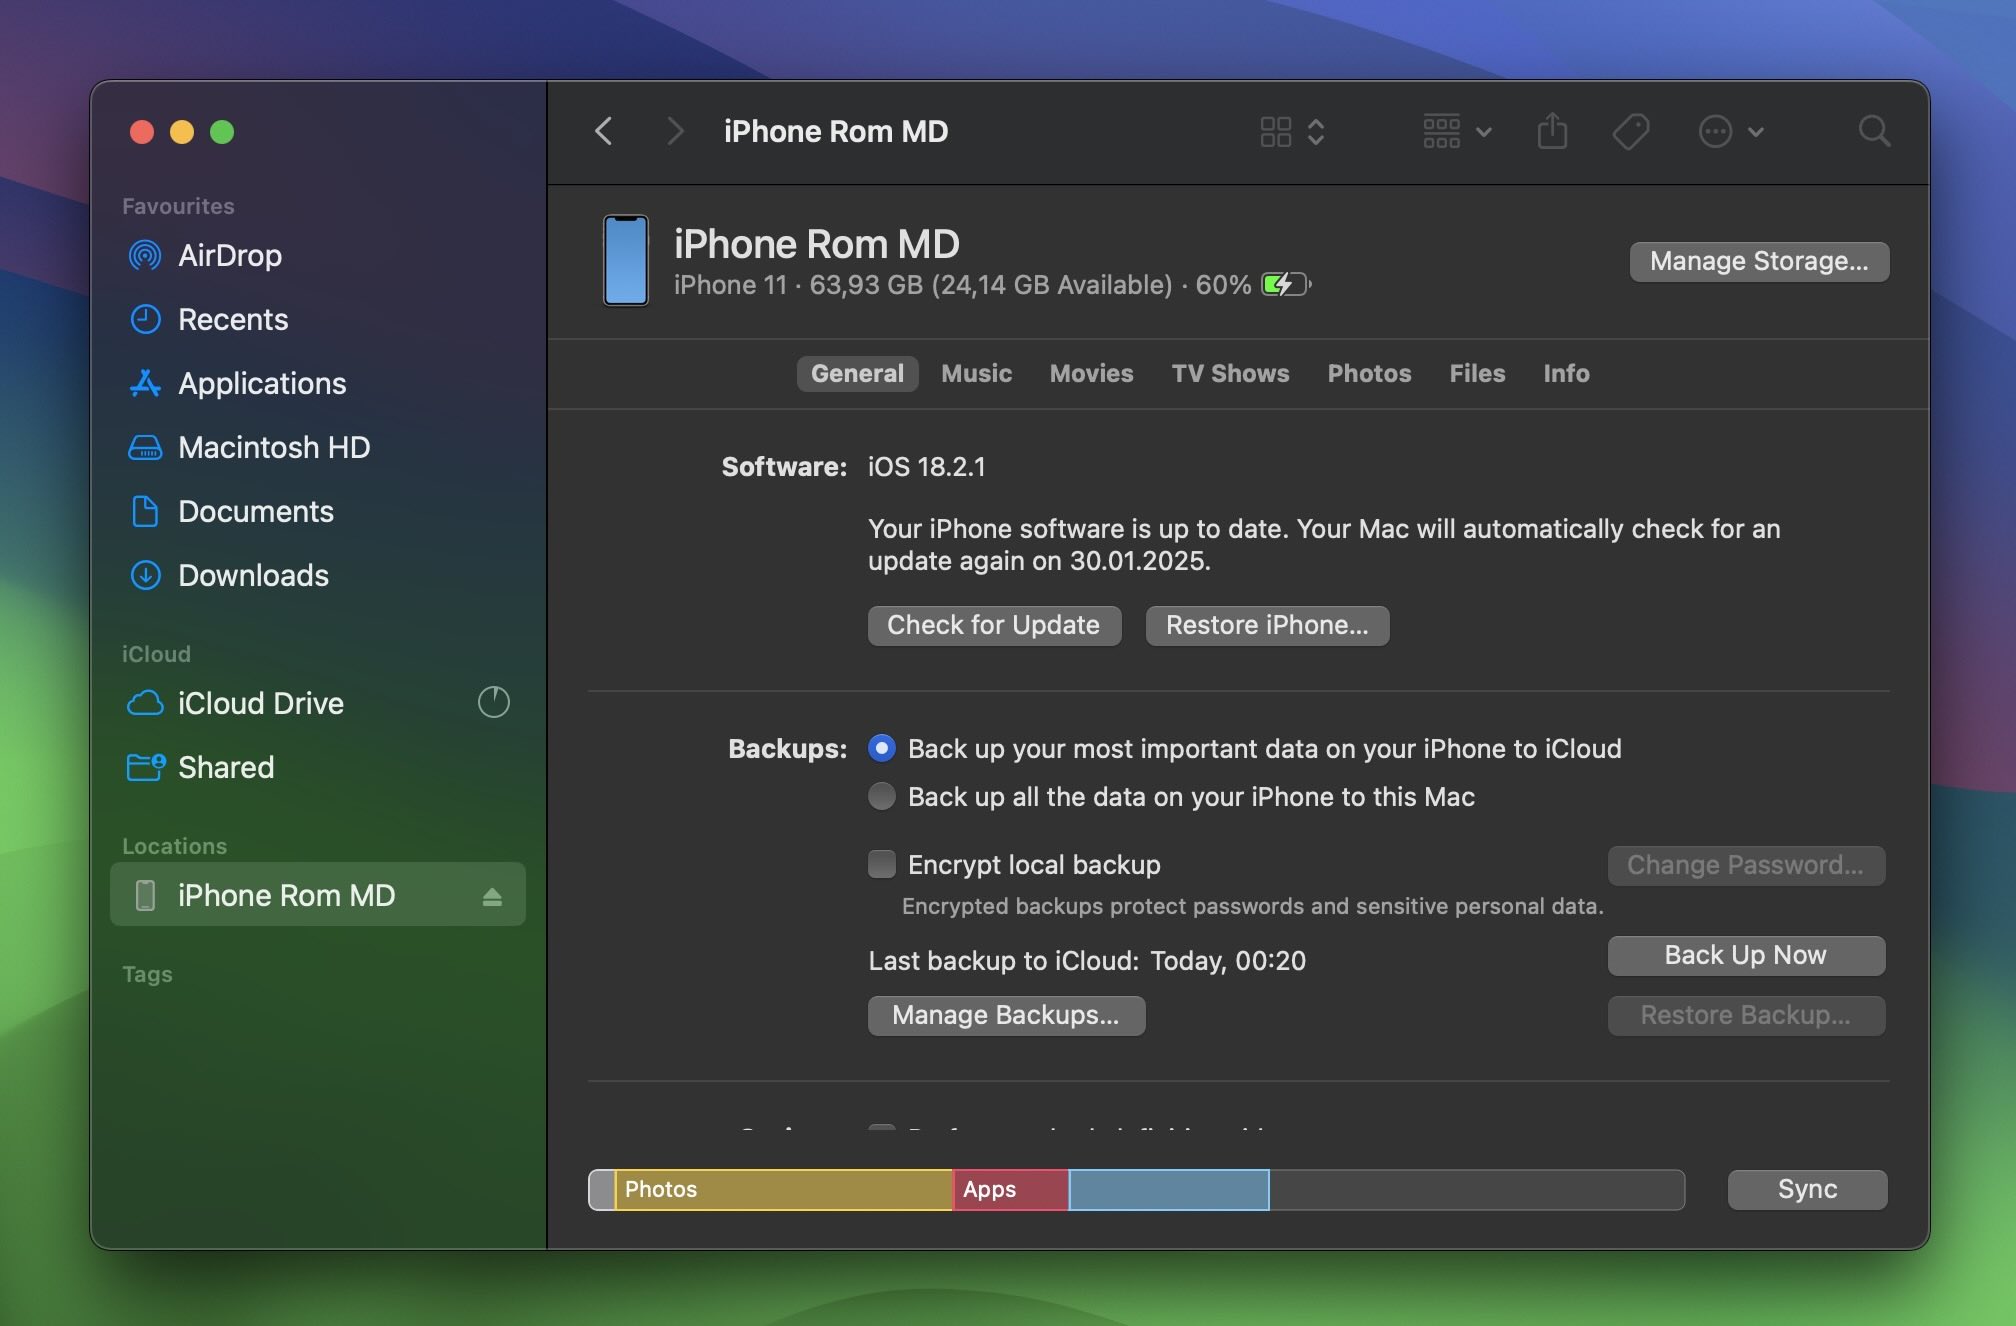
- To copy photos, navigate to the folder where your photos are stored. Select and copy the photos you want to back up.
- Navigate to a folder on your computer where you want to save the photos and paste them there.
You have more control over the process and can avoid the automatic synchronization that sometimes leads to duplicates when you back up your photos manually. This method makes sure that you transfer your photos without creating unnecessary copies on your iPhone.
Should I Disable Synchronization with iCloud to Stop Duplicates?
Although some articles and guides online suggest turning off iCloud sync to stop duplicates, it’s actually useless. Every case we can find, where people blame iCloud for duplicate photos usually comes down to human error—like repeatedly importing the same photos—or issues caused by third-party apps. While iCloud, like any system, can have occasional sync bugs, it doesn’t create duplicates on its own.
So instead of disabling iCloud, check the apps you use to make sure they don’t back up duplicate files. Also, avoid manually importing photos that already exist in your library.
How to Get Rid of Duplicate (And Similar) Photos
Ok, so now you know how to stop duplicates from appearing. But what about all the existing ones? This isn’t the end of the story.
Apple does include a built-in feature to help with this—you’ll find the Duplicates album under Utilities in the Photos app. But it has some serious limitations. First, it only detects exact duplicates, so visually similar photos that look almost identical won’t show up. Second, it takes time for your iPhone to flag duplicates, so they might not appear right away.
That’s why many third-party apps exist to clear both duplicates and similar images automatically. Some of them use AI to better identify, group, and suggest which image to keep from a set of similar photos.
We’ll show you how to use one of these apps: Clever Cleaner – Free iPhone Storage Cleaner. It’s one of the few AI-powered tools that are actually free. Unlike most apps that require a subscription or lock basic features behind a paywall, this one has no hidden costs and, surprisingly, not even ads. You can actually clean your library for free.
Here’s how to use it:
- You can either type “Clever Cleaner” into the search bar in the App Store or download it using this link.
- Go to the Similars tab.
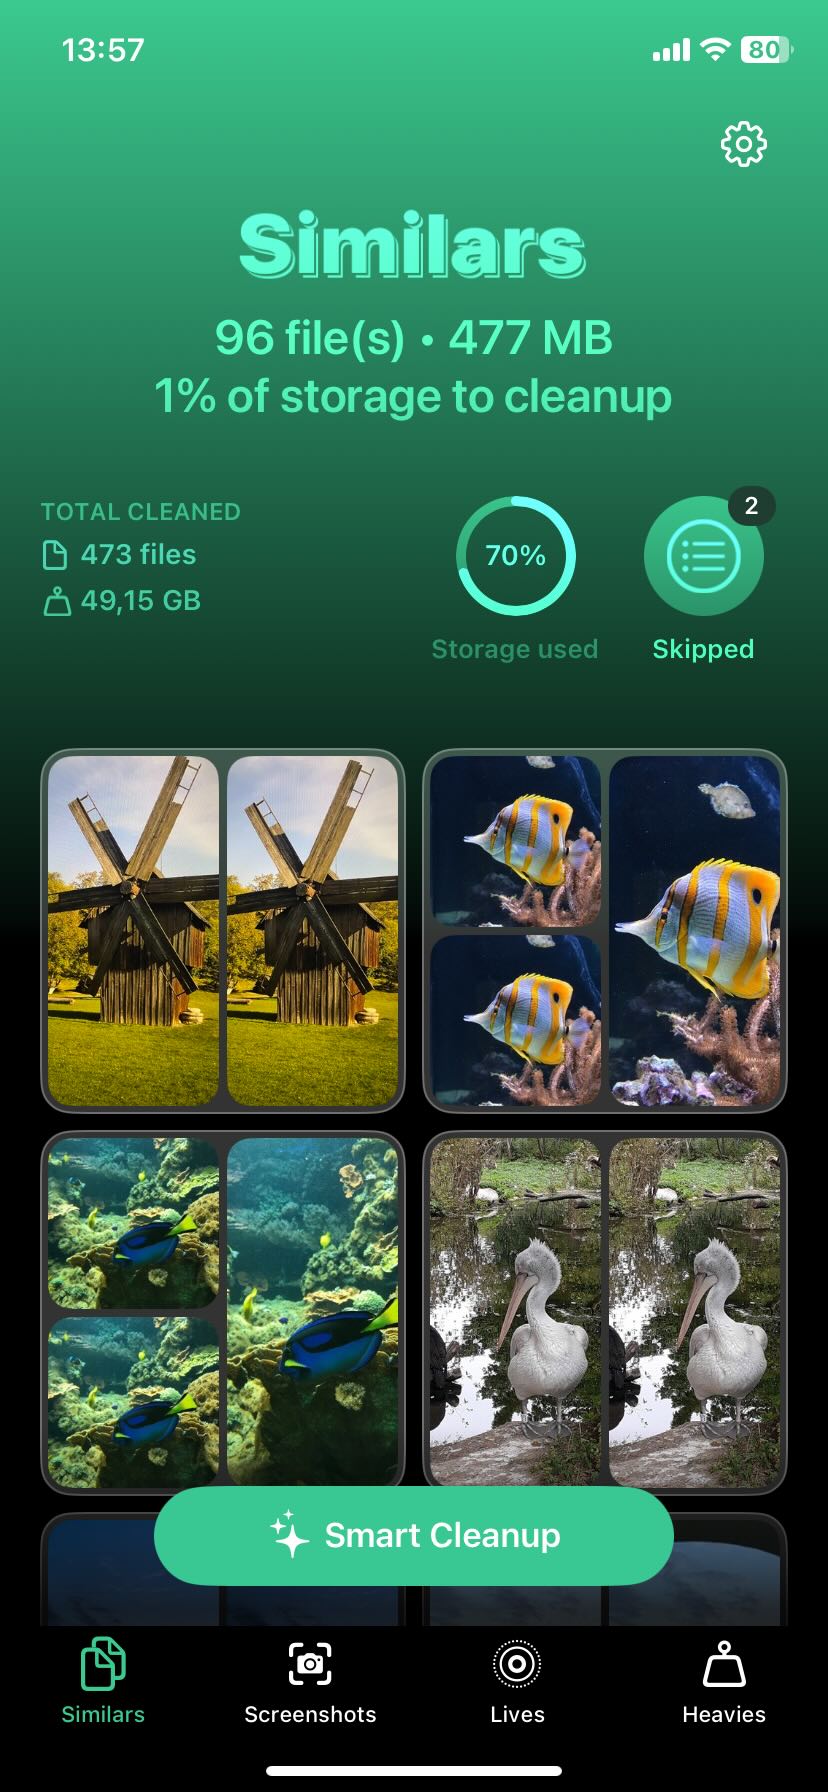
- At the bottom, you’ll see Smart Cleanup—this is automatic cleaning. It does everything for you. Tap it and let it scan for a few seconds.
- It will show a list of all images it suggests for deletion. If you don’t want to remove a particular photo, tap Restore to keep it.
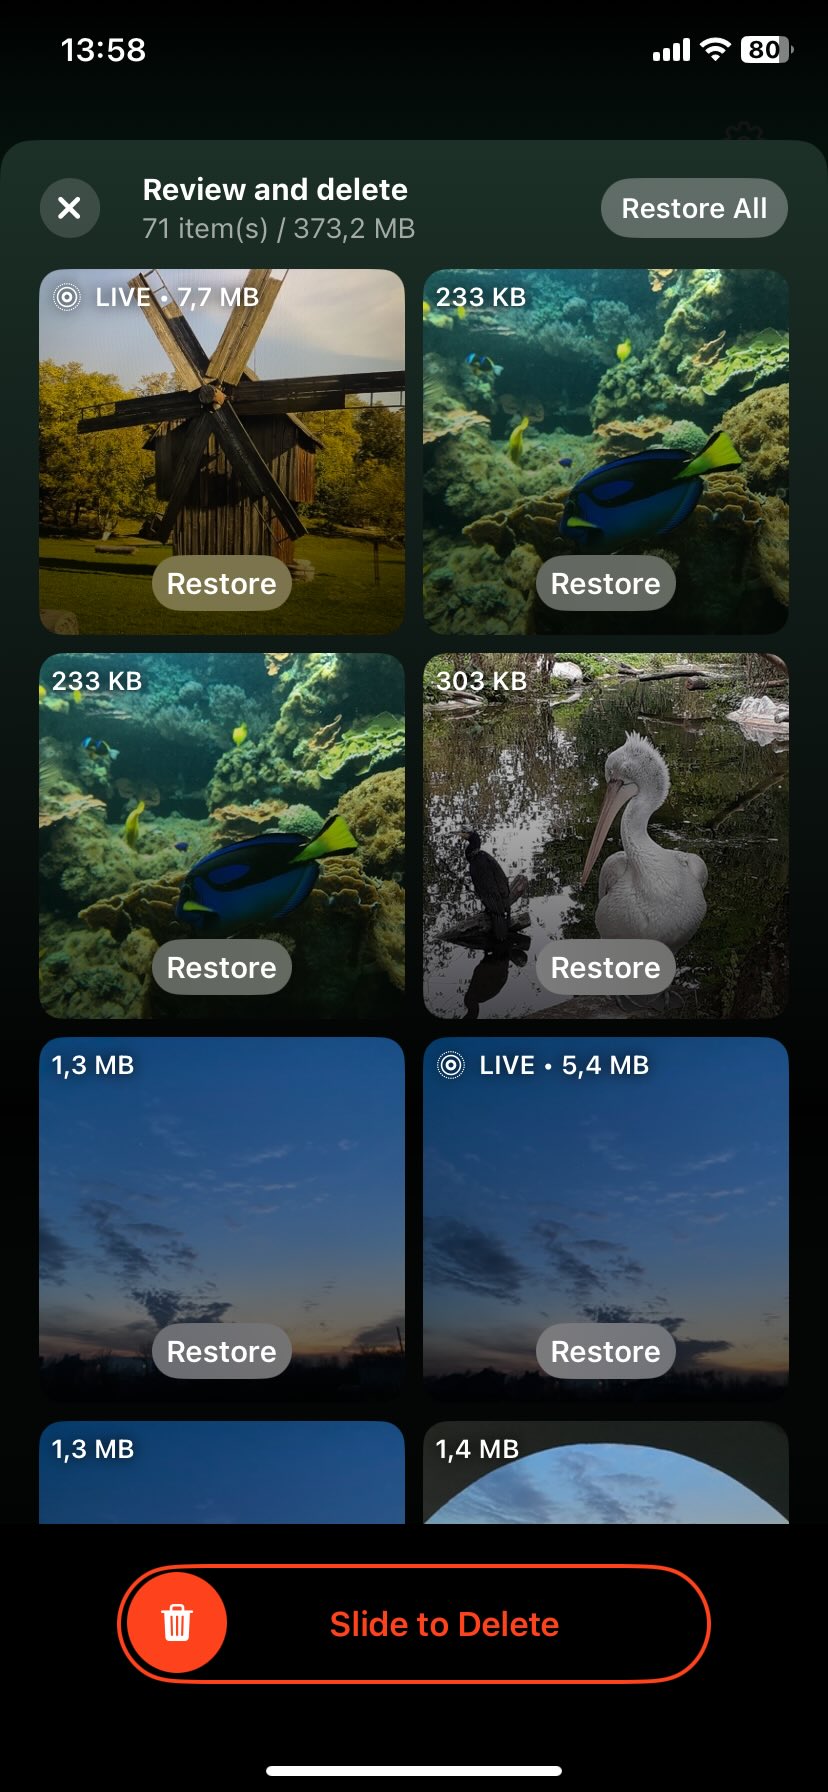
- Scroll through the list to review the selections. If you approve, Slide to delete—and that’s it.
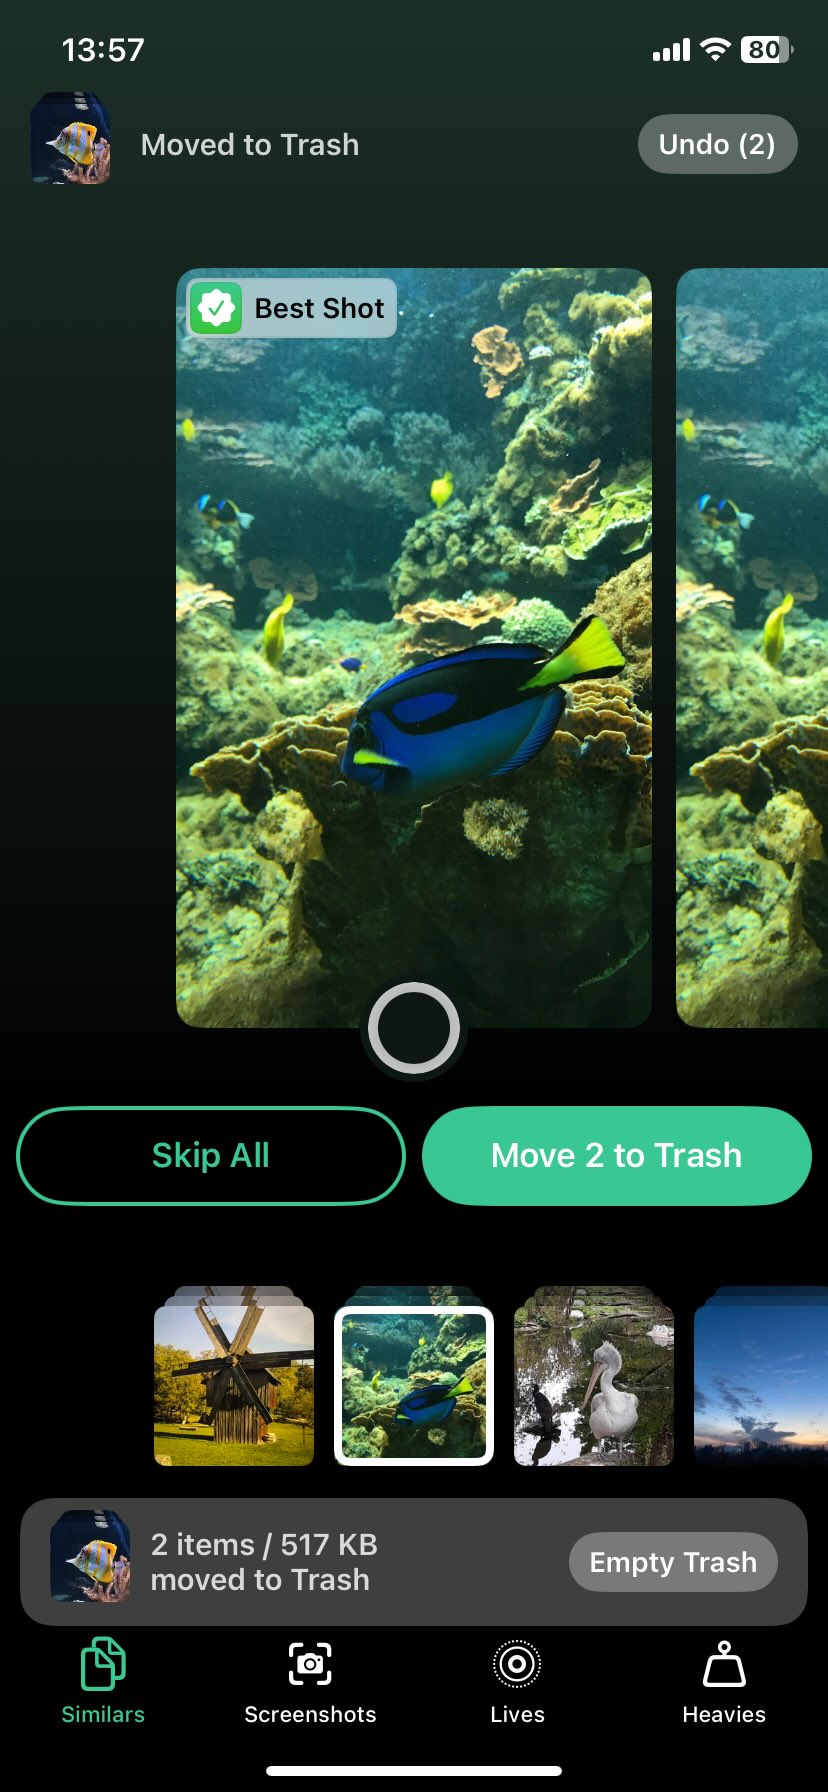
If you want a more hands-on approach, you can tap on each group and decide for yourself. However, the app still makes the job easier. It automatically preselects the Best Shot to keep, marking the rest for deletion.
- You can change the selection if needed.

- Tap Move to Trash to delete the marked photos. Or Tap Skip All to move to the next group. This process is smooth and fast. It takes way less time than manually sorting duplicates in the Photos app.
- When you’re done, tap Empty Trash at the bottom.
 The app will ask you to confirm the deletion—once you approve, the selected photos will be removed.
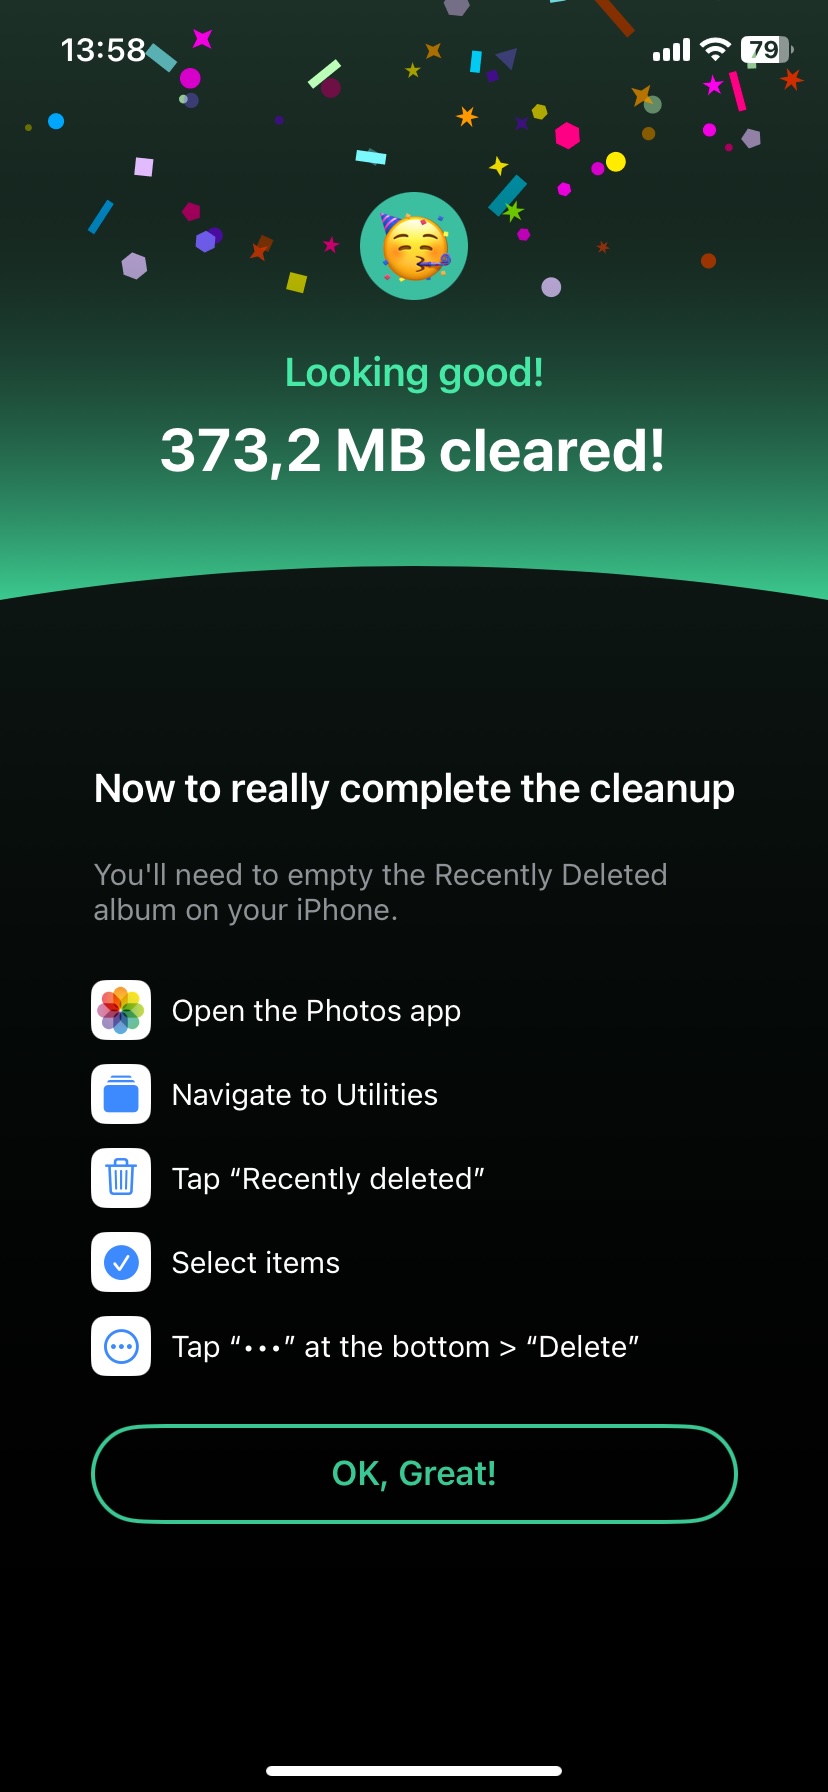
Be aware that, even though you deleted these duplicates, they will still occupy storage on your iPhone for 30 days before permanent removal. To free up space immediately, you need to manually clear them from Recently Deleted. Just go to Albums > Recently Deleted (under Utilities) and delete all duplicates.
You might have noticed other tabs in the app. These offer even more ways to clean up your storage:
- Screenshots – The app identifies all the screenshots you’ve taken to delete them in bulk.
- Lives – This feature converts (or as it calls it, “compresses”) Live Photos into still images.
- Heavies – It sorts your videos by size, from largest to smallest, for quick removal—something iPhones still can’t do natively.
A lot of these cleaner apps come with extra features beyond duplicate detection. If you need more free space, it doesn’t hurt to try the other 3 features.
Also, as the developer claims on the Clever Cleaner: AI Cleanup app’s official page: “Download Clever Cleaner today and enjoy lifetime access for free. Early users will never be asked to pay for upgrades or new features.” We can assume more features will be added in the future, and if you download it now, you’ll keep access to everything for free—no charges down the line. Considering how little space this app takes up, it might be worth keeping it installed for future cleanups.
FAQ
Why do I have duplicate photos on my iPhone?
Duplicate photos on your iPhone can arise because of different factors. Some of these are accidental duplication, importing from multiple sources, iCloud synchronization, backup restoration, and third-party app usage. If you are also taking multiple shots of the same thing, this may also lead to having duplicate photos.
Does using iCloud Photo Library create duplicate photos?
No, iCloud Photo Library doesn’t create duplicate photos on its own. However, issues can arise when manual imports, third-party apps, or multiple backup services interfere with iCloud’s sync process.
Can third-party photo management apps cause duplicate photos?
Yes, third-party photo management apps can contribute to creating duplicate photos. When using these apps for editing, organizing, or transferring images, they may save edited versions separately, leading to duplicates. To avoid having duplicates, you can change your settings to stop saving original photos after editing.
This article was written by Mako Young, a Contributing Writer at Handy Recovery Advisor. It was recently updated by Roman Demian.
Curious about our content creation process? Take a look at our Editor Guidelines.