If you’re looking for an easy solution to recover files after system restore on Windows 10 or earlier versions, look no further. We’ll show you which data recovery apps can help you the most, how to use them, and more!
Is It Possible to Recover Files After System Restore?
Yes, you can recover your files after a system restore, so this situation isn’t as scary as it might seem.
If you perform a system restore, it could delete or alter files on your computer. The outcome depends on the specific settings and options you select during the process. A system restore is designed to return your computer to its previous state. This means it may change system files, program files, and settings. However, the status of your personal files, such as documents, pictures, and videos, can vary. They may or may not be altered, depending on the settings you select when initiating the restore.
If you are among those who have lost important files after a system restore, do not despair. To can get your files back using data recovery software, which relies on sophisticated algorithms to find and recover deleted files. You can download free data recovery software, but paid data recovery applications typically deliver better performance, and they also come with extra features.
How To Recover Files After System Restore on Any Windows Version
The first step you need to take to recover files after system restore on any Windows version is to download a capable data recovery software application. Below are the programs we recommend the most, as they’ve proven themselves to be some of the best data recovery software we’ve encountered during our tests.
Option A: Disk Drill for Windows
 Disk Drill is a well-known program in the data recovery world. It has become known for its reliability, affordable pricing, and powerful recovery capabilities. The program’s free version allows you to recover up to 500 MB worth of files, no matter which version of Windows you’re using. Disk Drill also has a user-friendly interface, making it suitable even for complete novices with no technical skills.
To recover files after system restore with Disk Drill, you need to:
- Download Disk Drill from the company’s official homepage.

- Install Disk Drill and then launch it (don’t install the application on the drive you’re trying to recover).
- Click on the ‘Search for lost data’ button.

- Go through the list of recovered files and select the ones you want to save (Pro tip: if you can preview the file, it means you can recover it as well).

- Hit the ‘Recover’ button and choose a destination where you want Disk Drill to store your recovered files (it’s advisable to recover files to a different storage devices to avoid overwriting).

You should also keep in mind that if you want to recover more than 500 MB worth of files with Disk Drill, you need to switch to purchase a license. Make sure to check Disk Drill’s website for discounts, which are more than frequent.
With Disk Drill, it takes just a couple of steps to solve even the most complicated data loss scenarious. This software can help not only with system restore, but Disk Drill can also recover files after Windows factory reset and even help recover files that were lost after updating Windows. So far, my team and I have run it through numerous tests on different devices, and it’s shown nothing but excellent results. The tool is also completely safe to use.
Option B: Recuva
 Recuva is a freemium data recovery program that you can try for free. It does its job pretty well considering how much the full version costs, making it a good budget-friendly alternative to Disk Drill. Although Recuva supports only a limited number of file formats, all the basics are covered well.
To restore files after system restore with Recuva, all you have to do is:
- Visit the Recuva official website.
- Download the free version of the software.

- Install and then open the program<./li>
- Select the type of files you wish to restore (in case you don’t know which type of files you want to recover, select the All Files option).

- Hit the Next button.
- Select the drive you did a System Recovery on.

- Click the Next and then Start button.
- Select the deleted files you want to restore once Recuva is done scanning.
- Click the Recover button.

- Choose a location where you want to save your lost files.
- Click the Ok button twice.
Once you complete all of these steps, you should have your files waiting for you at the location you selected. Note that Recuva works on all recent Windows versions, and it can even recover deleted files on the ever popular Windows 7.
How To Undo System Restore on Different Windows Versions
The process of undoing system restore is always tedious and drawn-out. The steps you need to take to undo system restore depend on which Windows version you’re using. That’s why we’ll explain what you need to do for various Windows versions, such as Windows 10 & 8, 7, and XP.
Windows 10 & 8
To undo system restore on Windows 10 and 8, you need to follow the next few steps:
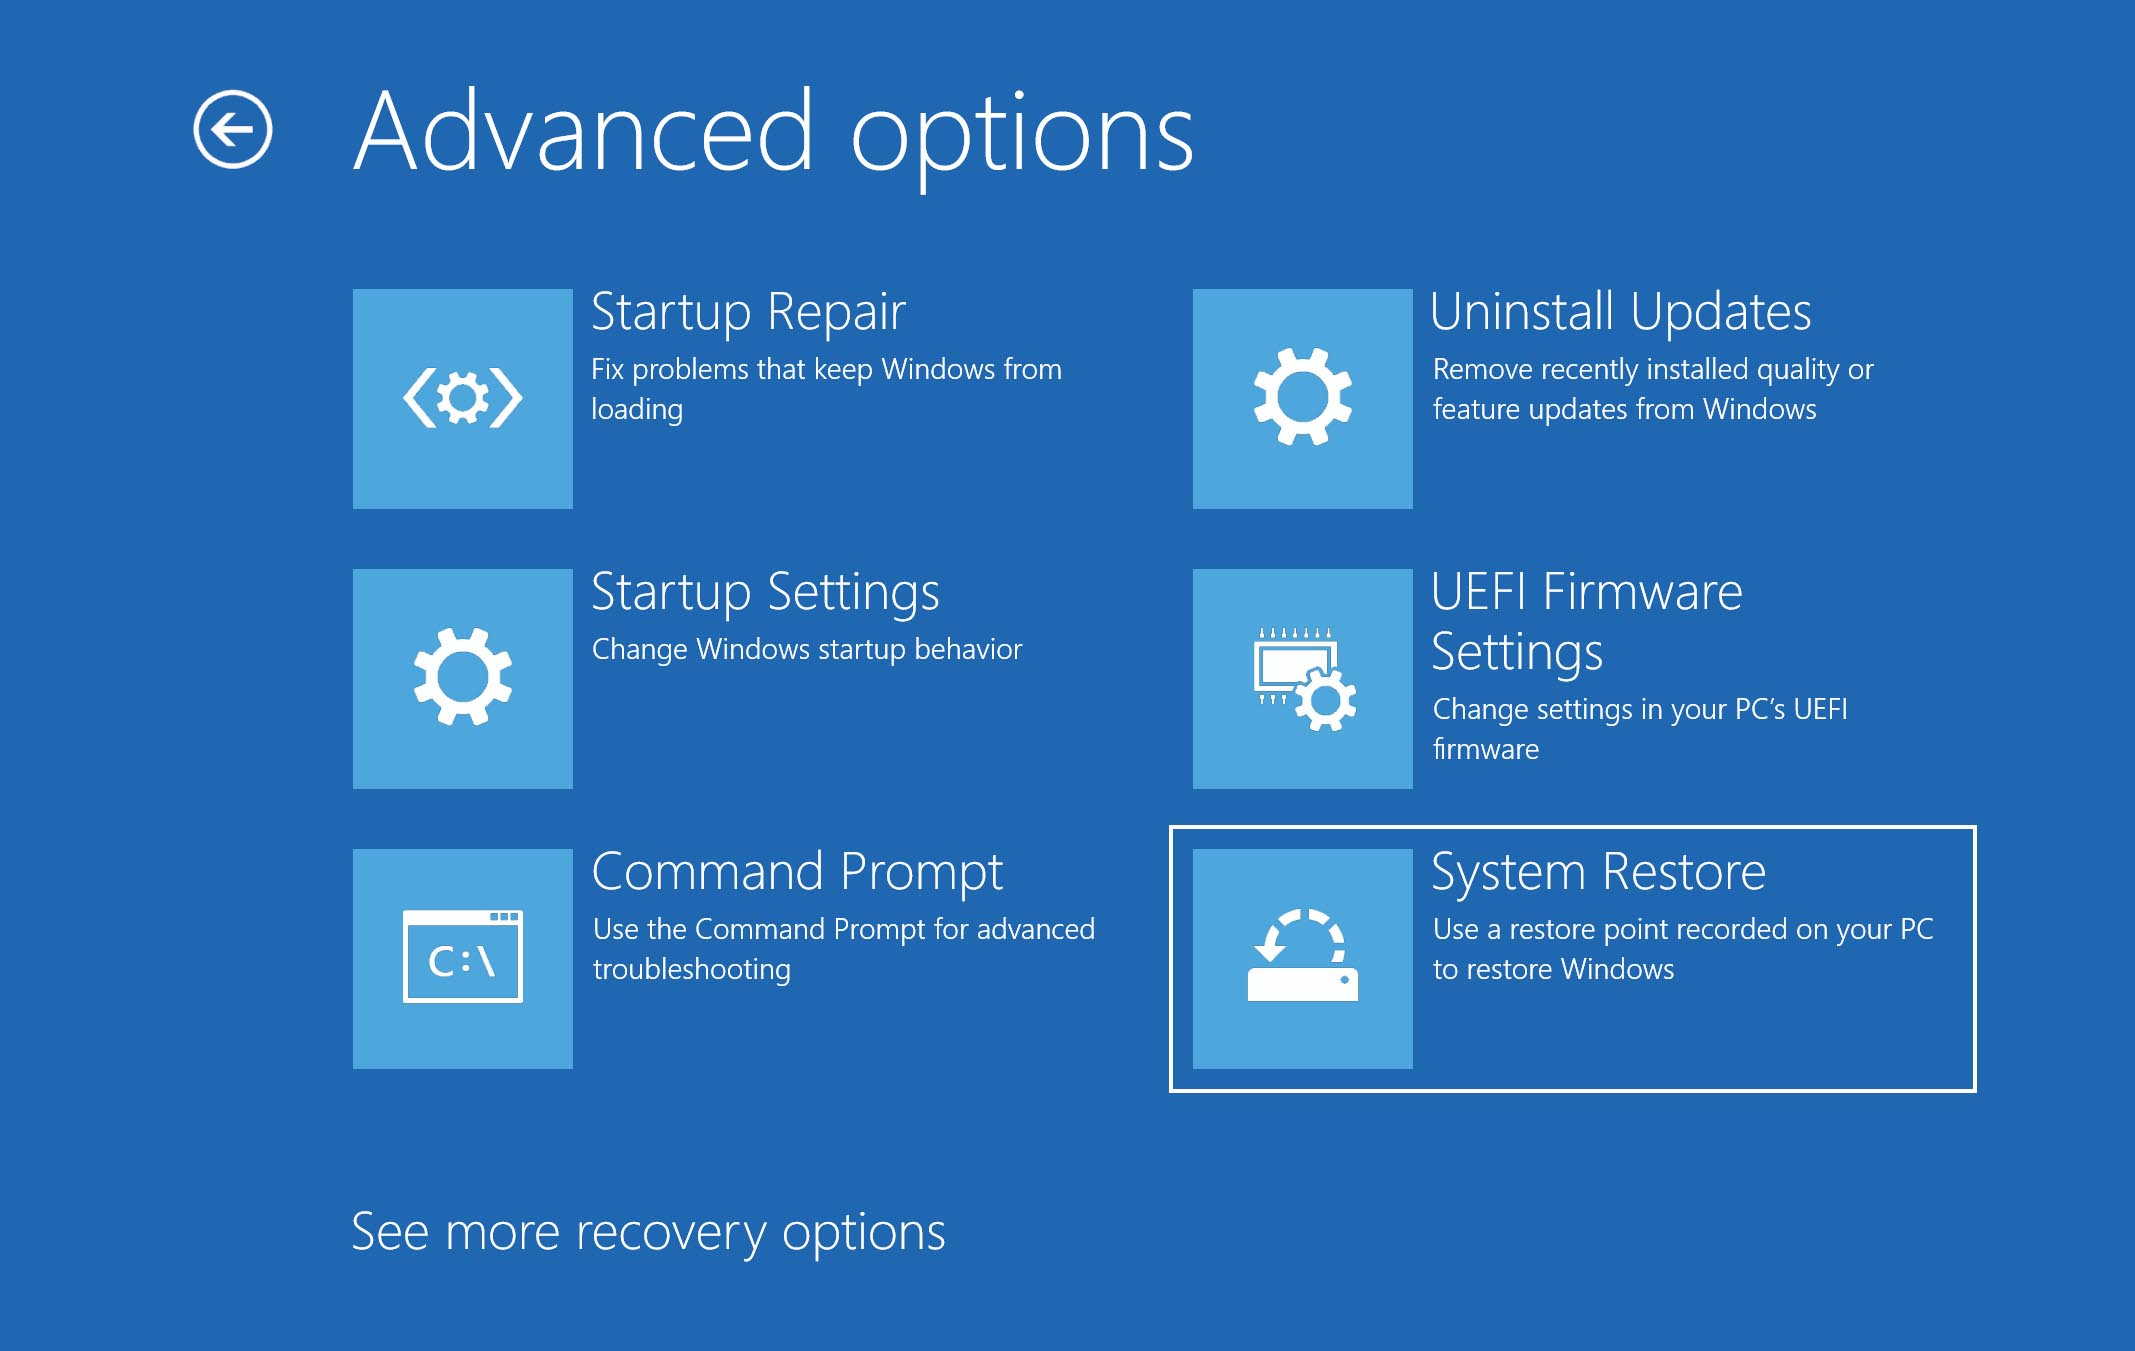
- Reboot your PC into Advanced Startup.

- Click on ‘Troubleshoot’.
- Select the ‘Advanced options’ and choose ‘System Restore’.
- Choose the Administrator Account and then type in your password.
- Click on ‘Continue’.
- Hit the ‘Next’ button on the following window.
- Select the restore point (it’s labeled as Undo under the Type column).

- Hit on ‘Finish’.

- Click ‘Yes’ when the next window pops up and then ‘Restart’.
Windows 7
Complete the following steps to undo system restore on Windows 7:
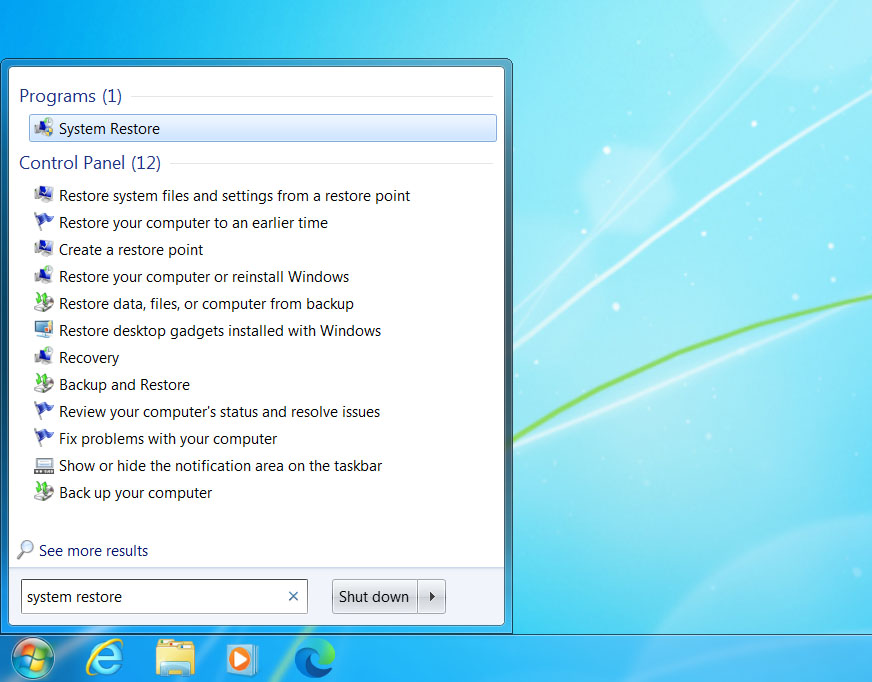
- Click Start.
- Type ‘System Restore’ in the search box and then click on the first result that comes out.
- Hit the ‘Undo my last restoration’ button on the System Restore window.
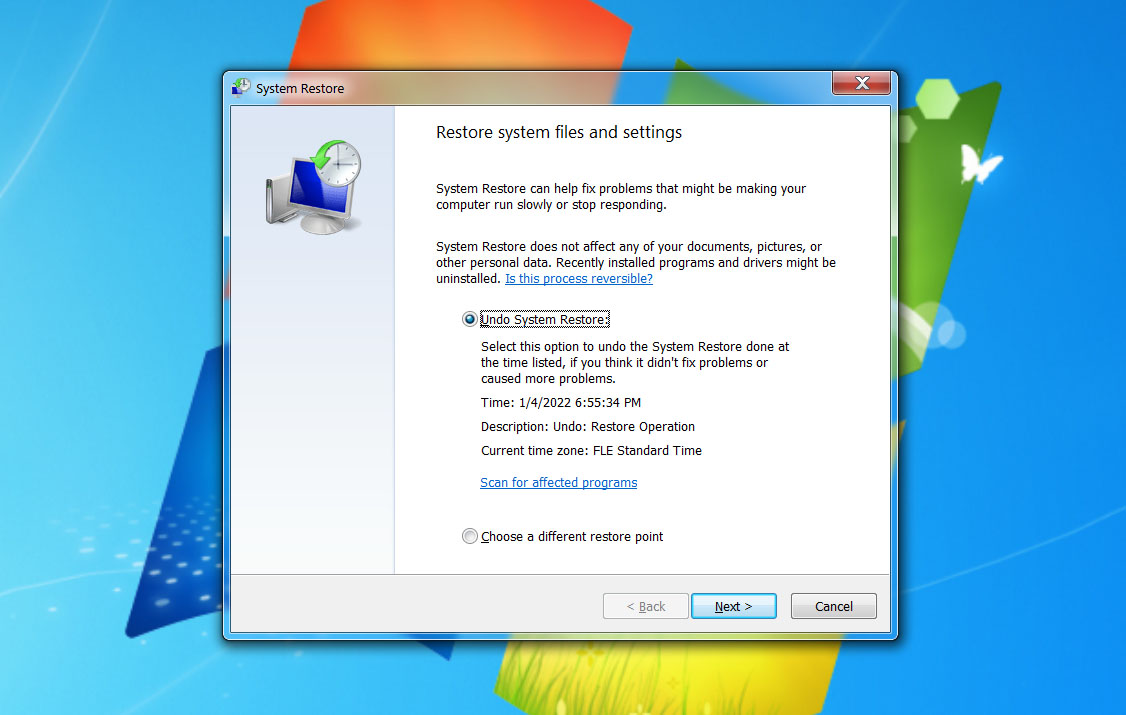
- Click Next.
- Hit the Finish button.
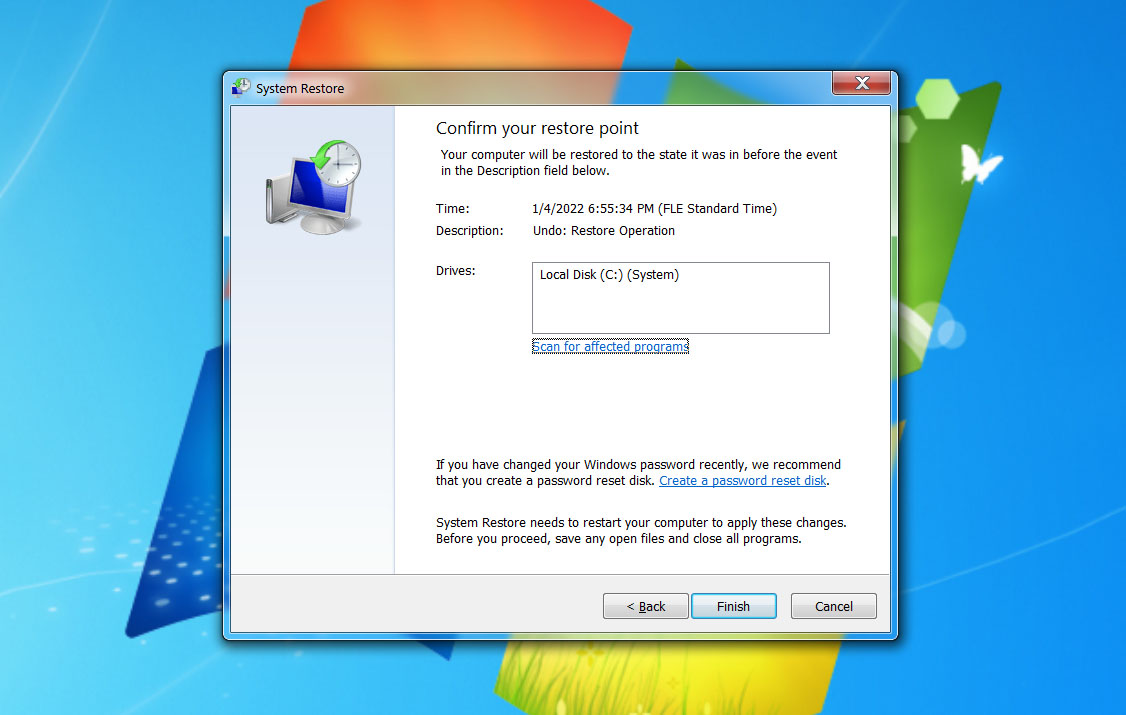
Once you complete these steps, your computer will restart automatically and the process will be completed.
Windows XP
If you’re a Windows XP user, complete the following steps to undo system restore on your computer:
- Click on the start button.
- Choose All Programs > Accessories > System Tools > System Restore.

- Click on the ‘Undo My Last Restoration’ option.
- Click the Next button.
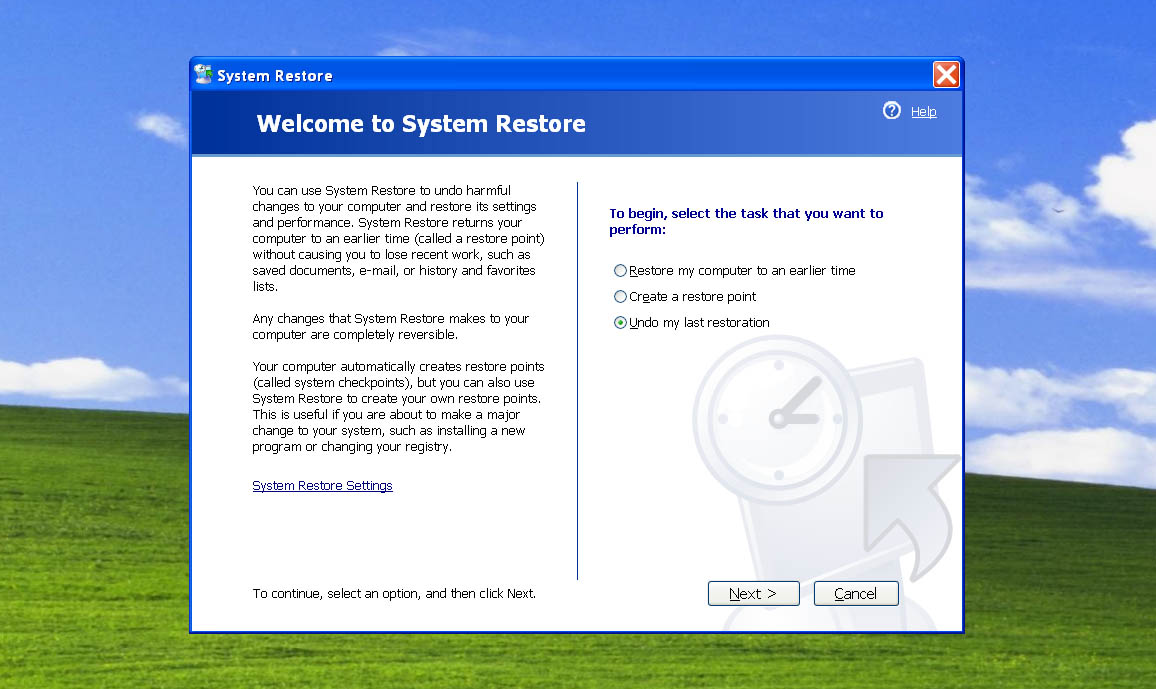
- Hit the Undo button.
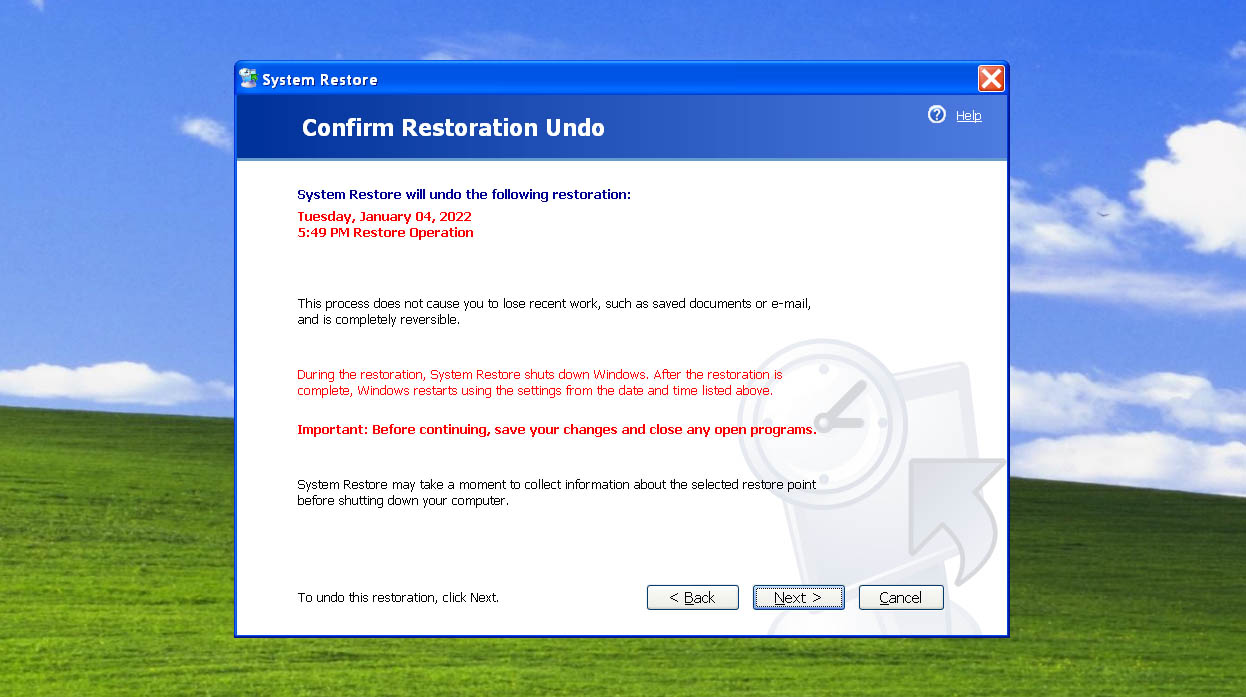
- Wait for your computer to restart and then click the Ok button in the System Restore window.
What About Windows 11?
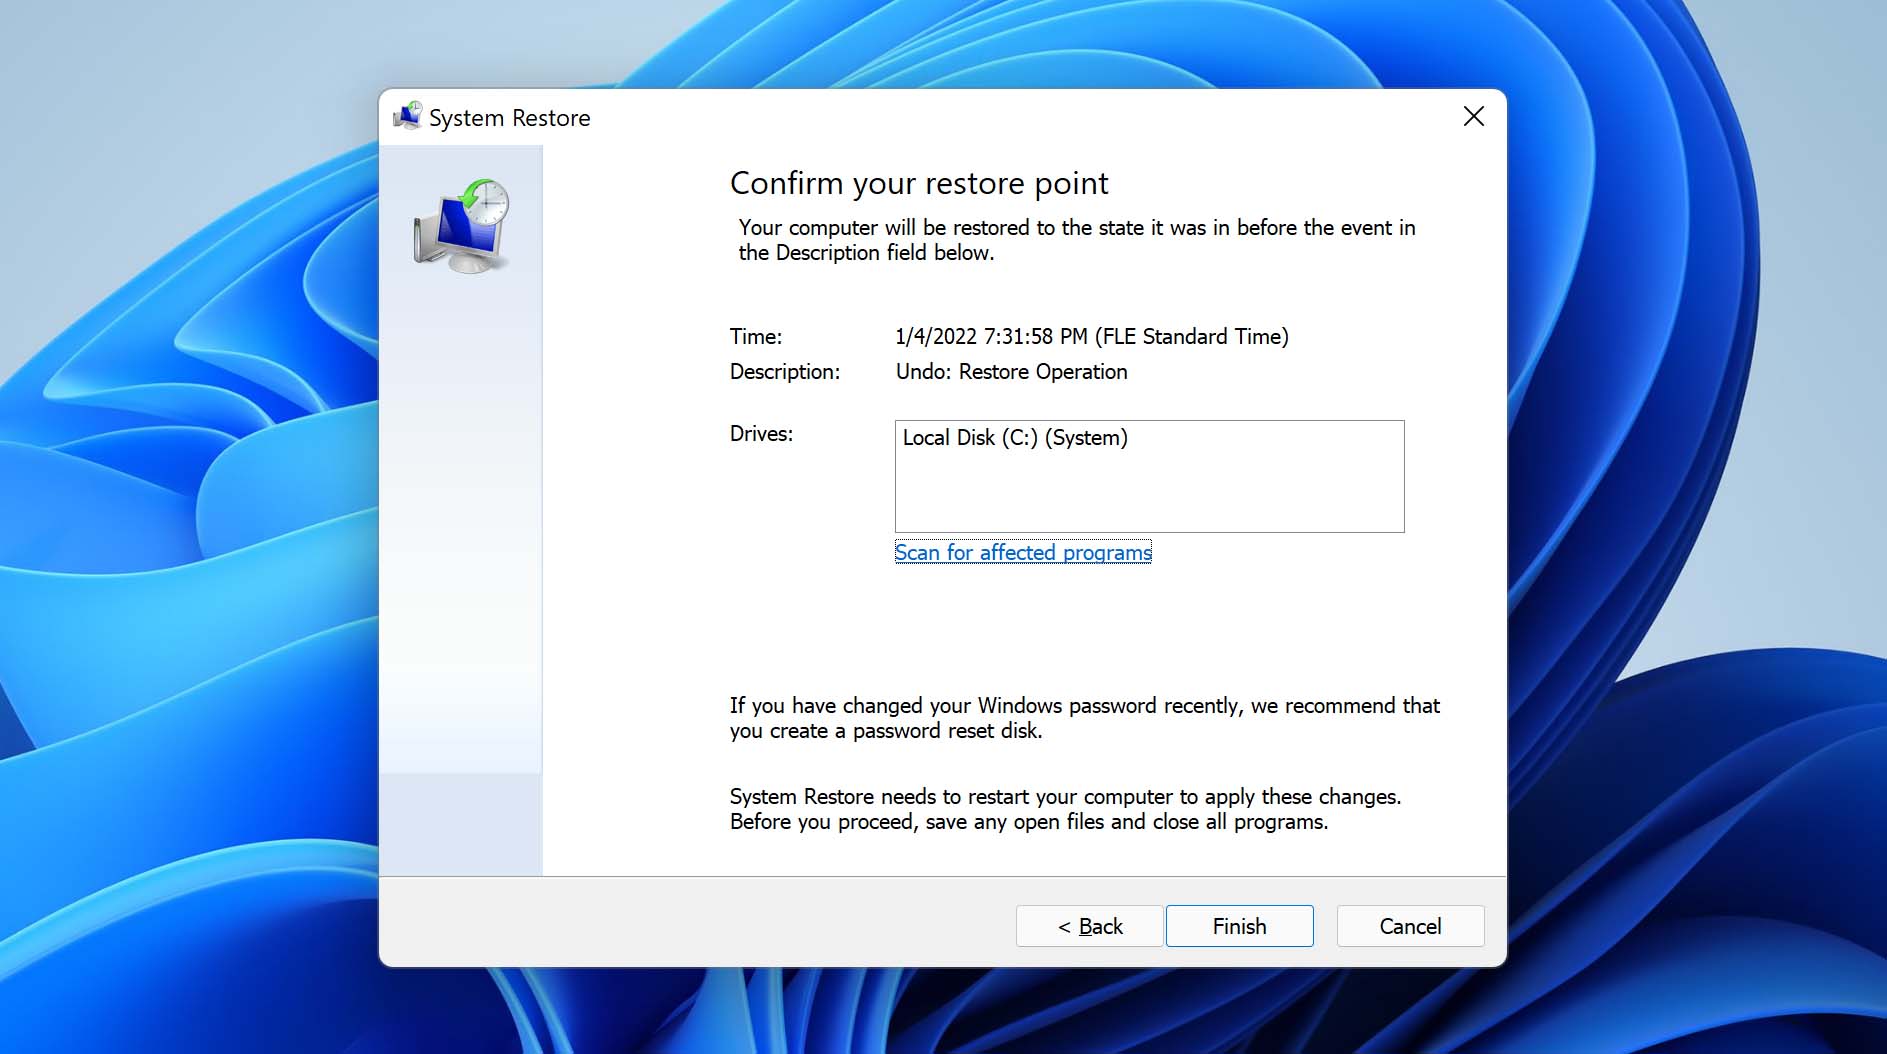
Don’t worry, you can still undo a system restore on Windows 11. To do so, all you have to do is:
- Go to the Control Panel.
- Type ‘recovery’ and then select the first result.

- Click on ‘Open System Restore’.

- Select ‘Next’ when the Restore system files and settings box comes up.
- Choose the restore point you want to use in the list of results.
- Select ‘scan for affected programs’.

- Go through the list of items that will be deleted and click on Close>Next>Finish when you’re ready to move on.
FAQ
Does a System Restore recover deleted files?
In case you have lost personal files such as photos, emails, videos, documents, etc., you cannot recover them with System Restore. To restore these types of files, you have to use data recovery software.
I did a system restore and lost everything, what should I do?
If you have done a system restore and lost some valuable files in the process, you don’t have much hope for them unless you use data recovery programs.
Can changes made by system restore be undone?
Changes made by the system restore cannot be undone if you did a system restore in safe mode or from the Advanced Start Options menu at boot.
How do I find a lost file on my computer?
You have several methods available if you want to find lost files on your Windows computer. You can either use the Windows search function or try restoring the deleted files from a backup. Both of these options are time-consuming, so if you want an easier solution to install a data recovery program. Take Disk Drill for example–it will allow you to find your lost files in no time and without having to do much tinkering.
Conclusion
All in all, if you want to recover lost files after doing a system restore, your best bet would be to use data recovery software. Programs like Disk Drill allow you to get ahold of your lost files fast and easily. The only thing you have to do is follow the program’s prompts and try not to panic!
This article was written by Logan Tooker, a Contributing Writer at Handy Recovery Advisor. It was also verified for technical accuracy by Andrey Vasilyev, our editorial advisor.
Curious about our content creation process? Take a look at our Editor Guidelines.
