
Accidentally deleting or otherwise losing important files from your Chromebook can feel like a mistake of catastrophic proportions. Fortunately, there are several methods to get back deleted files on Chromebook, and I’m here to share them with you.
In this detailed guide, I’ll walk you through the steps I took to recover deleted files on ChromeOS, the operating system that runs on Chromebooks, so you can restore your lost data and, hopefully, breathe a sigh of relief.
Different Ways to Store Files on ChromeOS
Storage Location |
Possible Recovery Methods |
Recovery Chances |
Google Drive |
Google Drive Trash |
High |
Downloads Folder |
Chromebook Trash or Manual Backups |
Moderate |
Removable Devices |
Data Recovery Software or Manual Backups |
Moderate |
Chromebooks are designed with slightly different data storage habits than Windows, macOS, or Linux computers.
The primary storage solution on ChromeOS is Google Drive, Google’s cloud storage platform. Files in Google Drive are continuously backed up to the cloud, so they can be easily recovered when something happens to the Chromebooks on which they were originally created. Since Google Drive comes with its own protection against accidental deletion, the likelihood of you being able to recover your files is very high.
While Google Drive is the preferred storage method, ChromeOS also provides options for local storage in the form of the Downloads folder, the only writable folder on the internal solid-state drive (SSD), and removable storage devices, such as USB flash drives and SD cards.
Files stored locally (in the Downloads folder or on removable devices) are not automatically backed up to the cloud. This means that if these files are deleted, they are more challenging to recover compared to files stored in Google Drive. That said, they can be retrieved using data recovery software (in the case of files stored on removable devices) or from manual backups (in the case of both removable storage devices and downloaded files).
Solution 1: Recover Files Stored in Google Drive
As someone who’s been relying on cloud storage for years, I can attest that Google Drive is the best storage solution for most ChromeOS users.
If you’ve accidentally deleted files that were stored in your Google Drive, then you most likely have nothing to worry about. Why? Because All files deleted from Google Drive are automatically moved to the Trash folder, and they stay there for up to 30 days. Here’s how you can recover them:
- Open the Google Drive app on your Chromebook. If your Chromebook doesn’t work or you no longer have access to it, then you can access the Google Drive app from any other computer by opening the following URL in a web browser: https://www.google.com/drive/
- Click on Trash (it might be labeled as Bin in some regions) in the left pane.
- Scroll through the Trash to find the file you want to recover.
- Right-click the file you want to recover and pick the Restore option.
The file should now be restored to its original location in Google Drive. If you can’t find the file in the Trash, don’t despair. There are two other options to try:
- Click the Search bar in the top section of Google Drive and type the name of the file you’re looking for. Sometimes, files can be buried deep within folders or may have been moved to a different location before deletion.
- If you still can’t find your file, you can reach out to Google Support for assistance. They may be able to provide additional guidance or, in some cases, help recover permanently deleted files, especially if the cause of deletion was malware.
Solution 2: Recover Files from External Storage Devices
If you’ve deleted files from an external storage device connected to your Chromebook, such as a USB flash drive or SD card, you can use data recovery software running on a Windows or Mac computer to retrieve them (sadly, there’s no data recovery software for ChromeOS).
Data recovery software should be able to find your missing files if two conditions are met:
- The deleted files haven’t been overwritten with new data: When you delete a file, it isn’t immediately removed from your storage device—only the logical references leading to it are. If you act quickly, you can still restore these references.
- You select a capable data recovery software application: Not all data recovery tools are created equal. Choosing a reliable and effective software application is essential for successful file recovery.
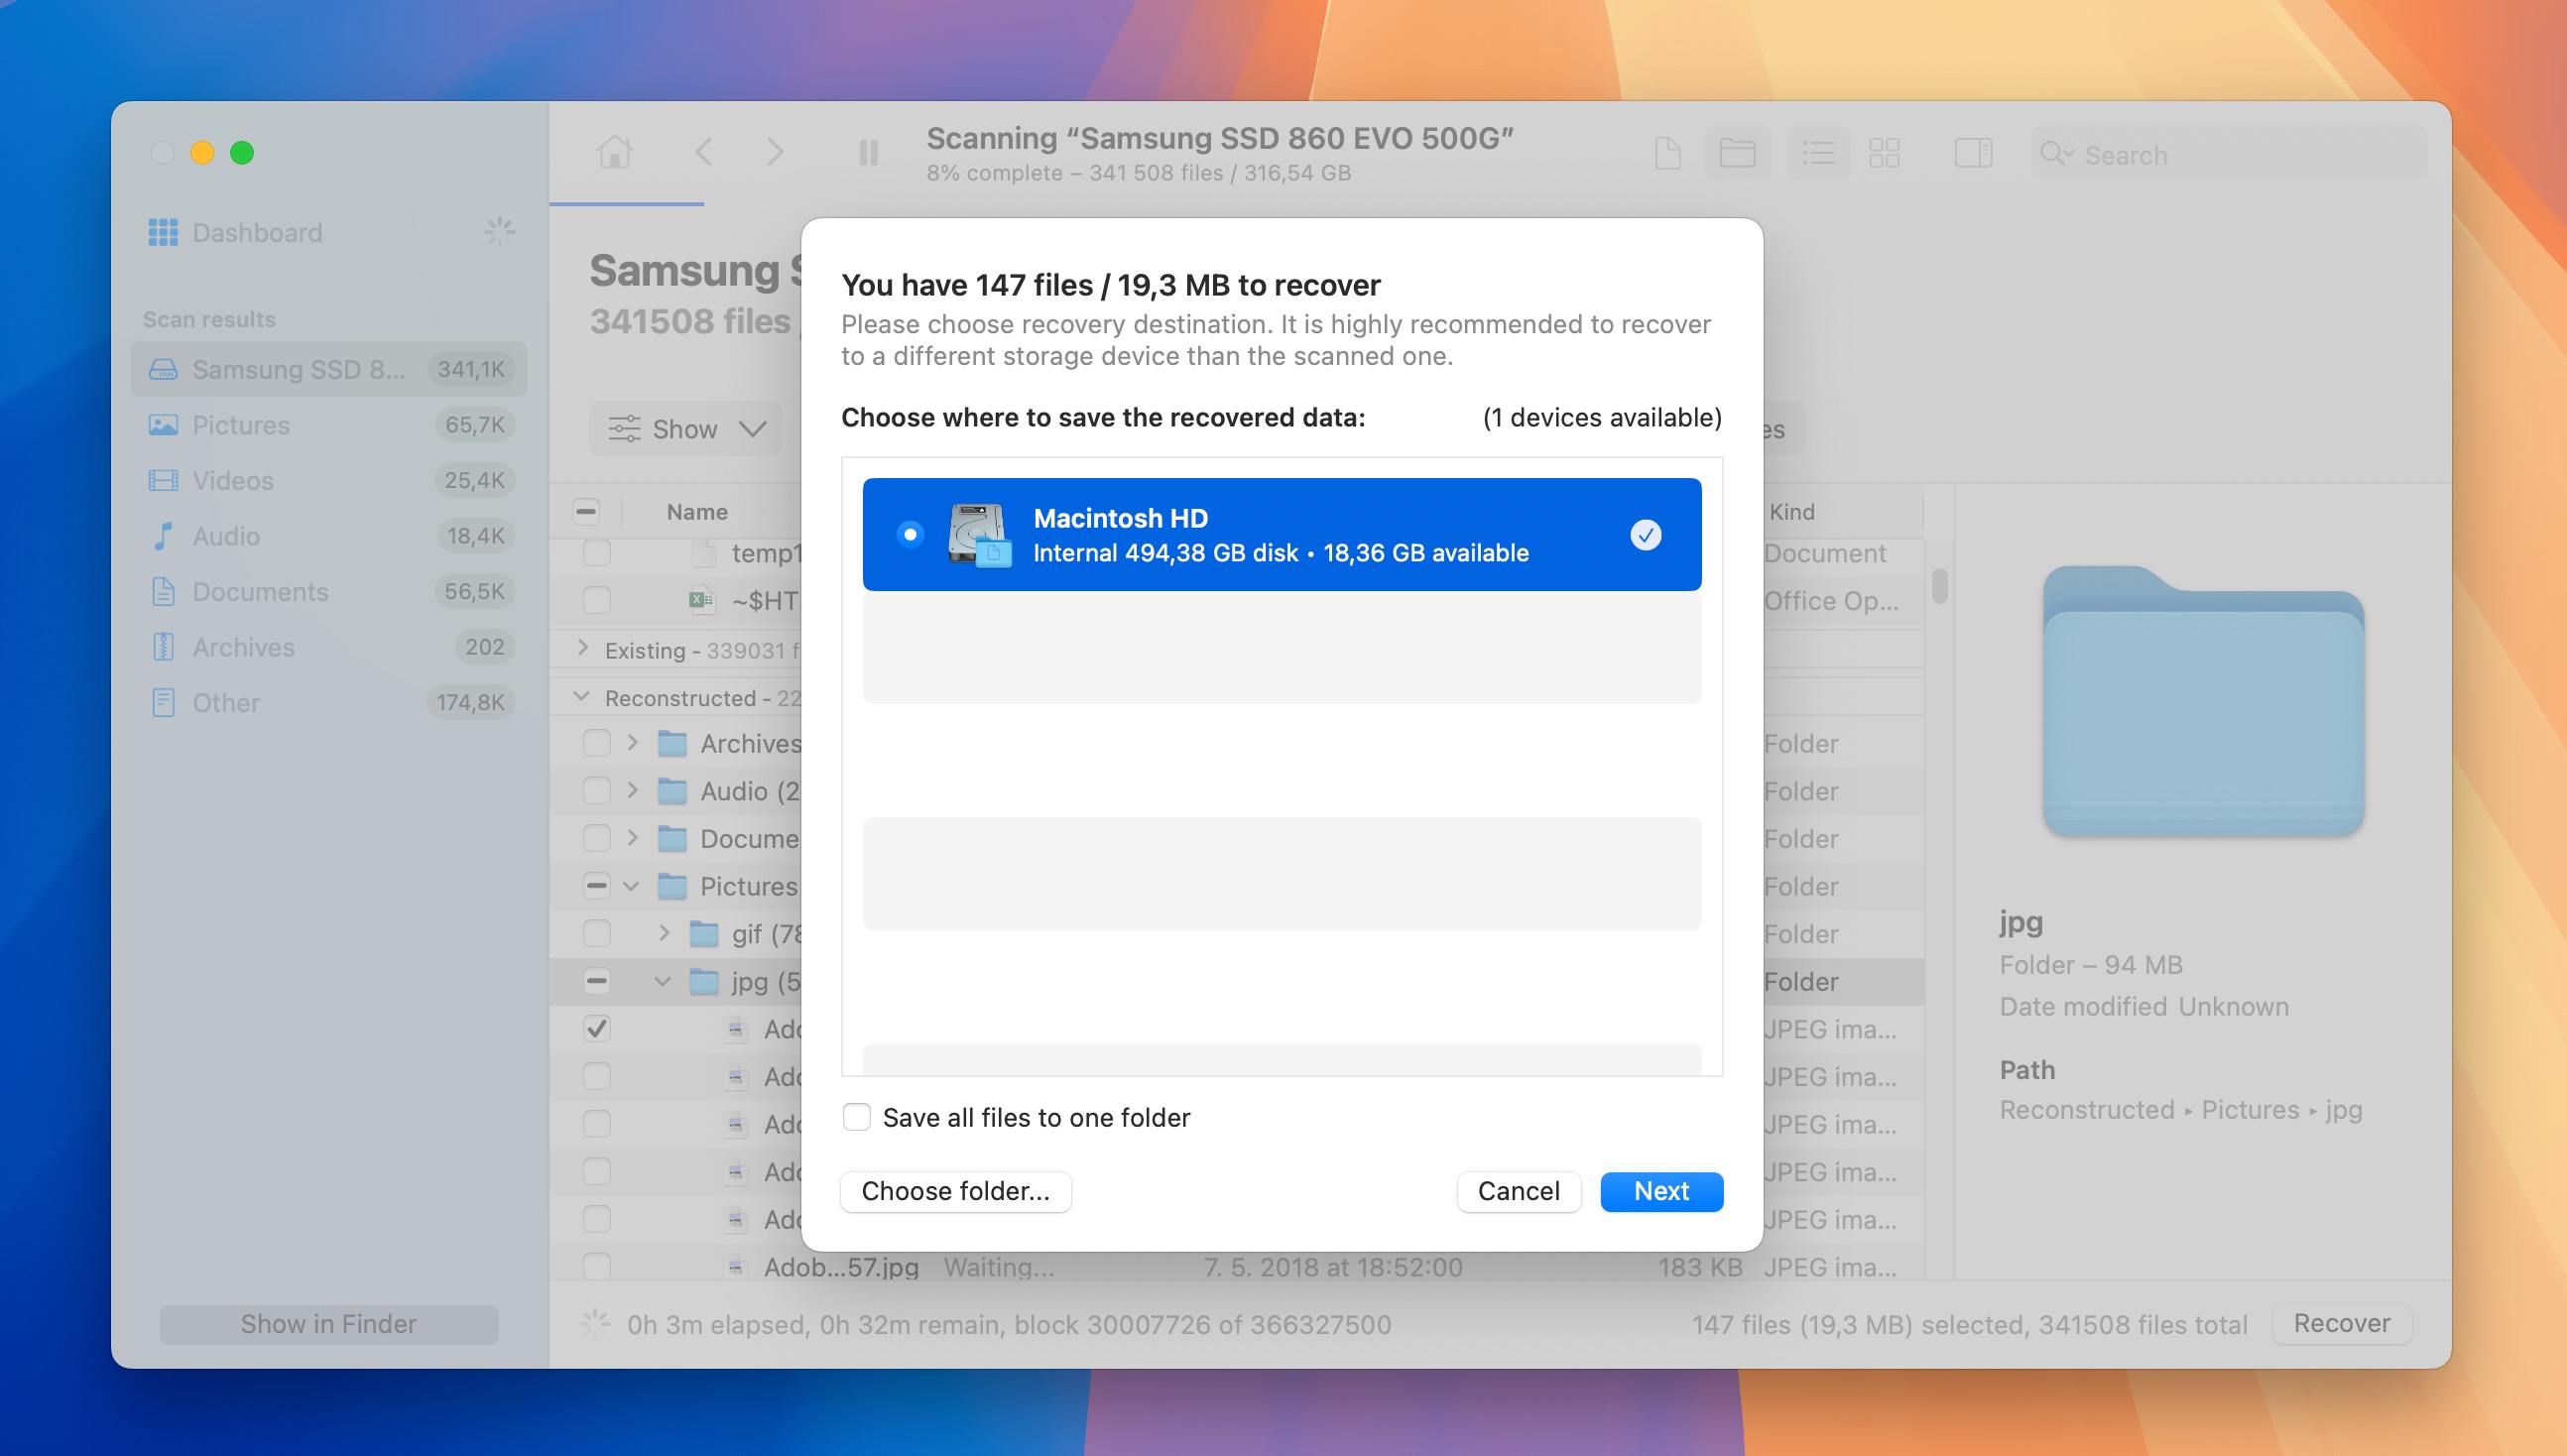
I personally recommend Disk Drill from CleverFiles. Not only have I used it successfully multiple times to recover deleted files from USB drives and SD cards, but countless other people have too. In fact, Disk Drill is one of the most popular solutions of its kind because it combines ease of use with professional-grade recovery results.
With the free Windows version of the software, you can recover up to 500 MB of data and preview as many files as you want to verify their recoverability. Follow these steps to get deleted files back on Chromebook with the help of Disk Drill:
- Disconnect the external storage device from your Chromebook.
- Connect it to a Windows PC or Mac computer.
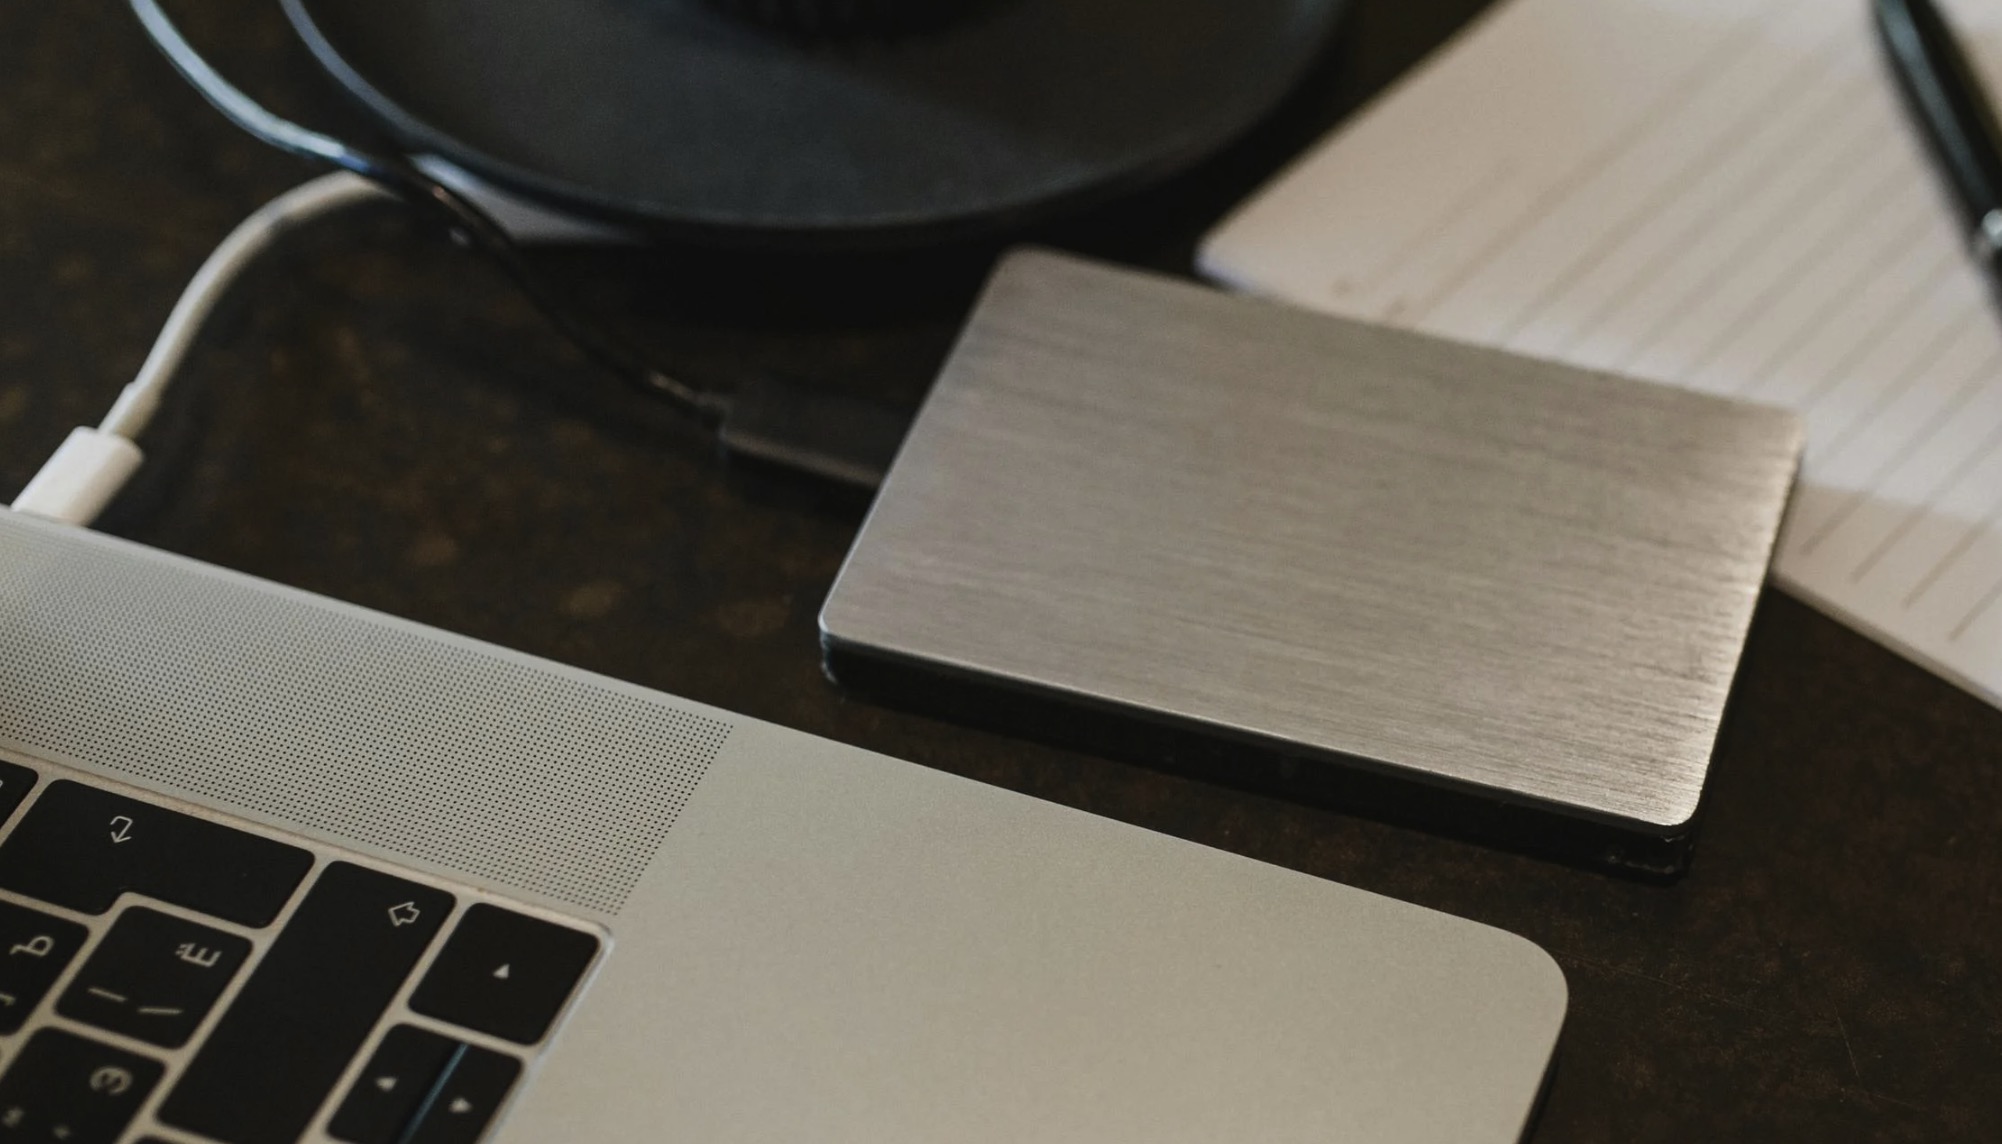
Photo by Arina Krasnikova from Pexels: https://www.pexels.com/photo/portable-drive-connected-to-laptop-5951759/
- Download and install Disk Drill on the computer.
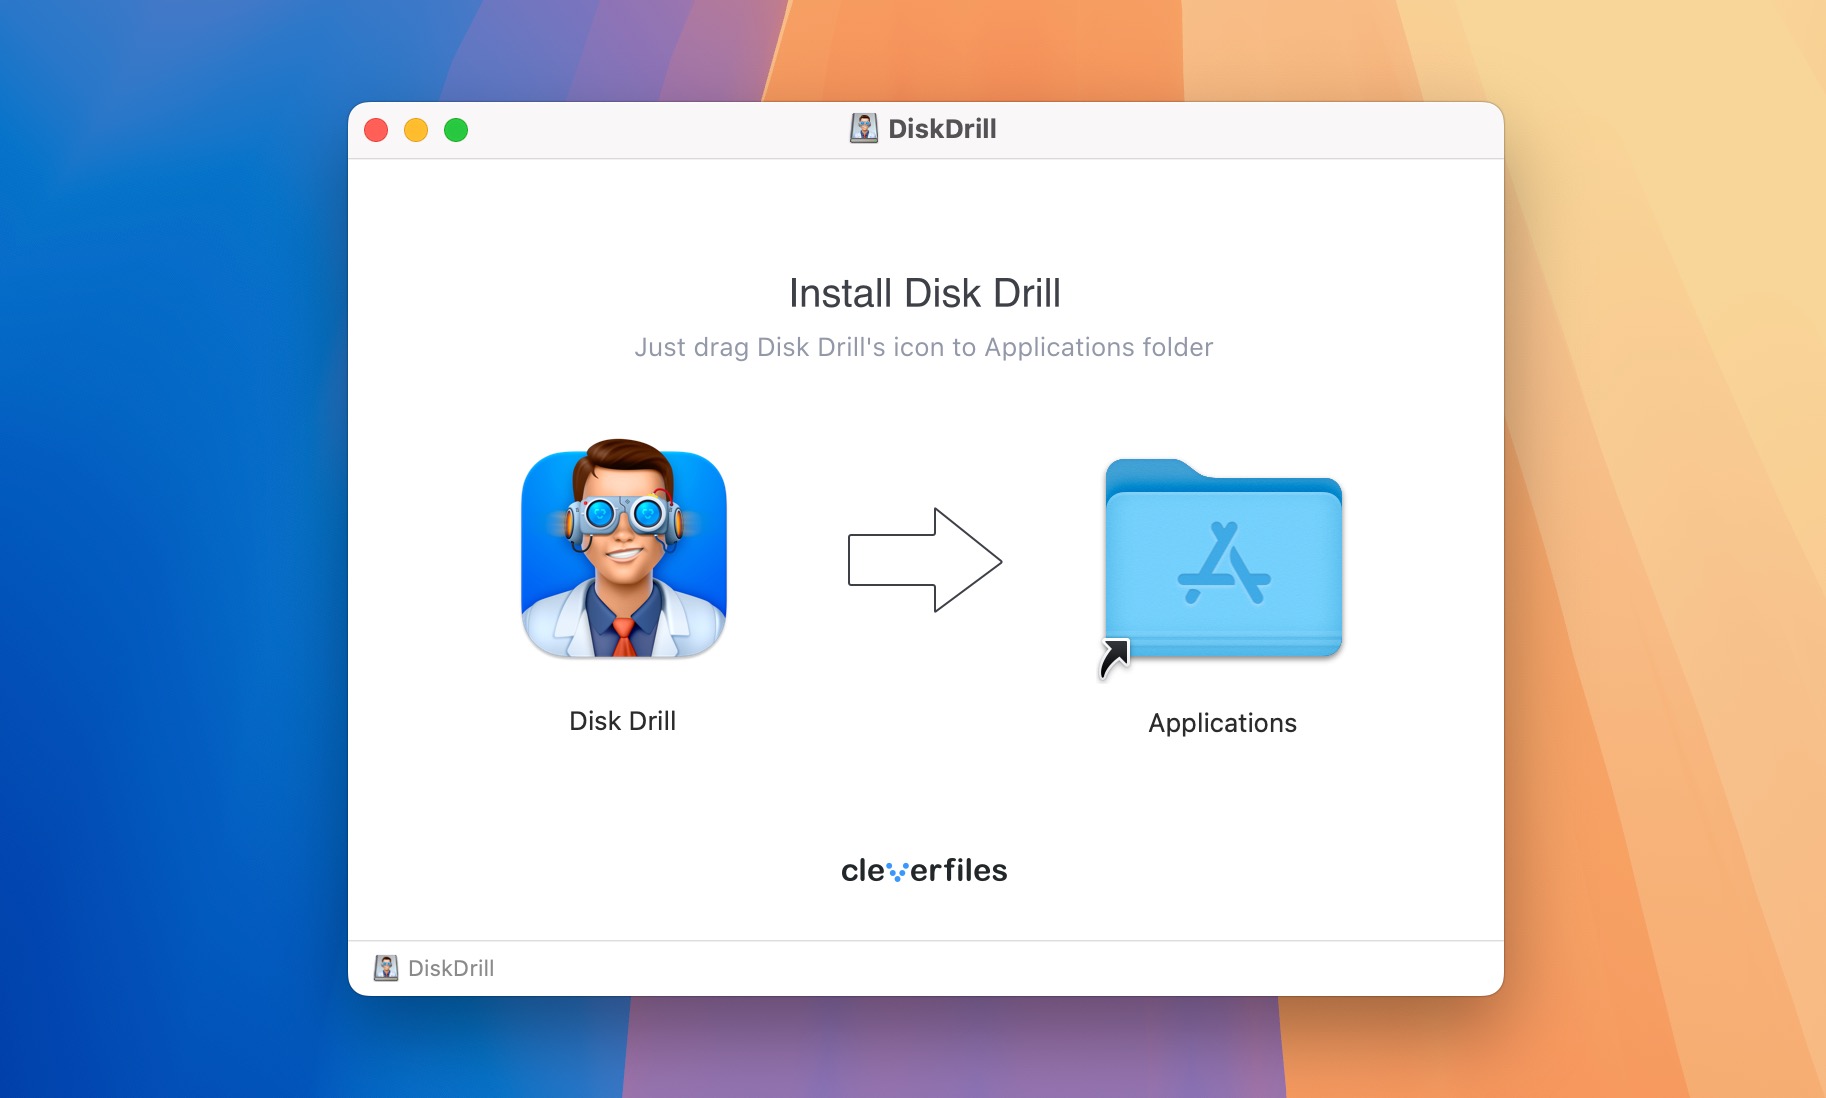
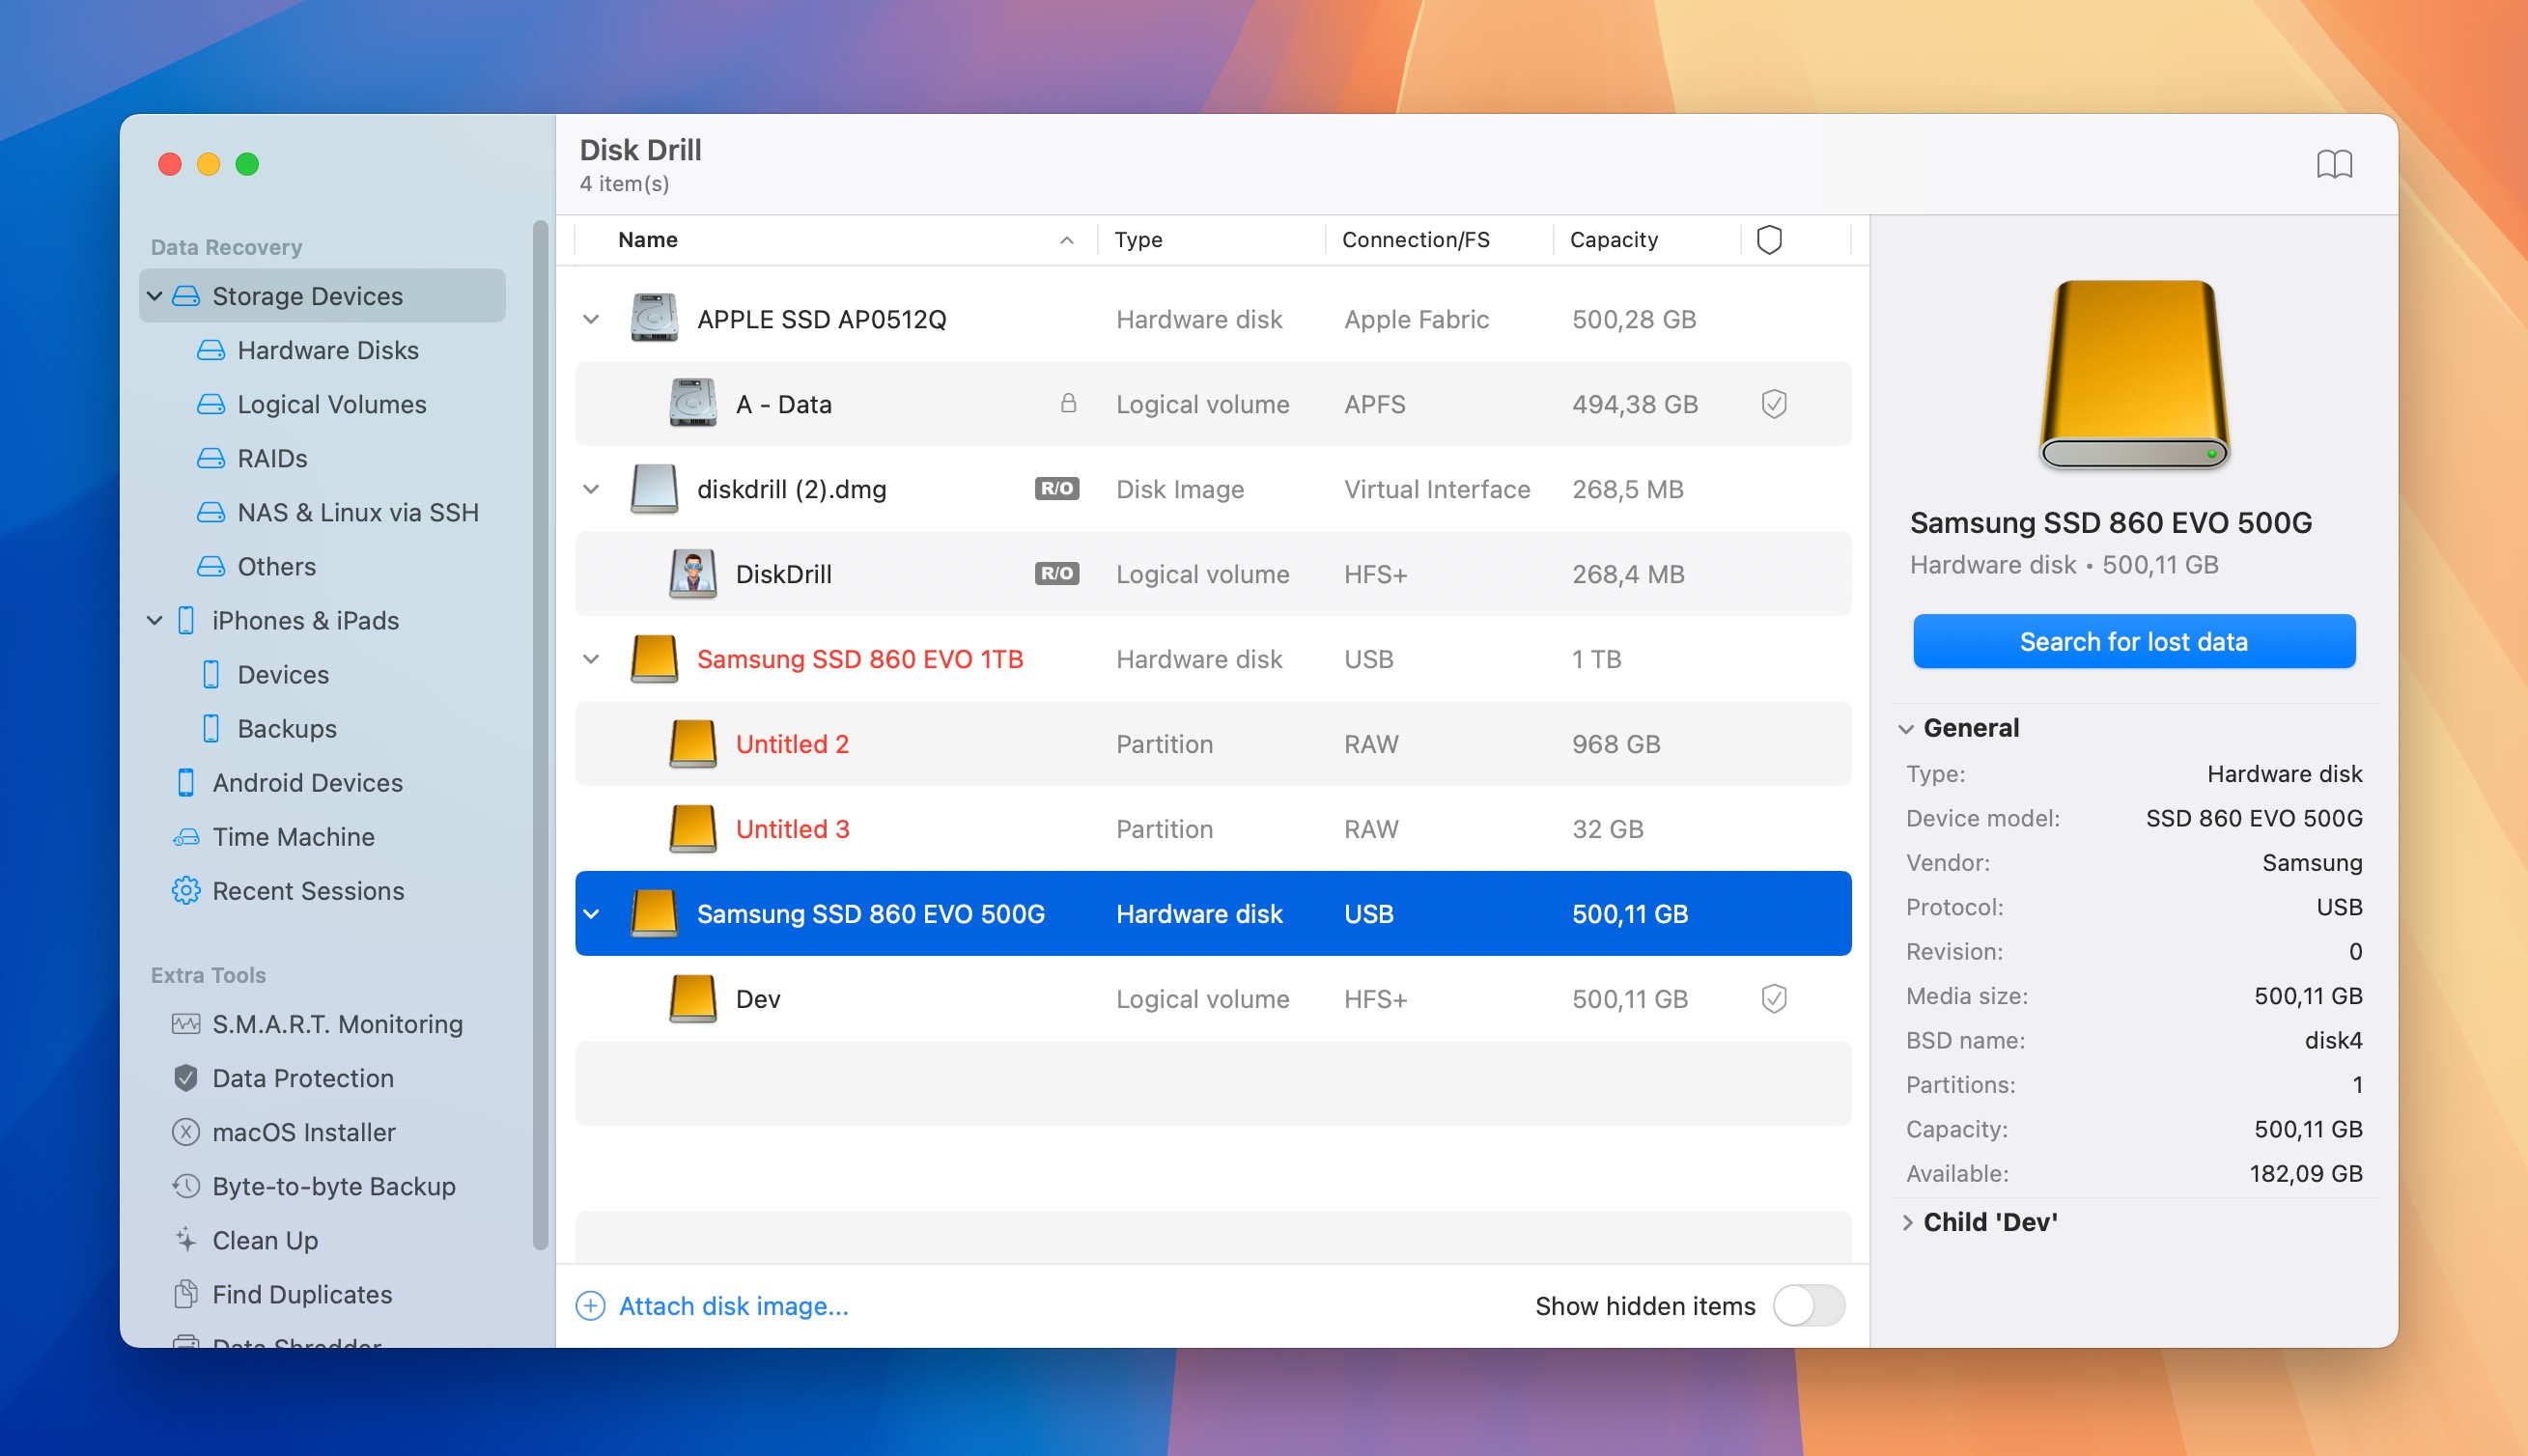
- Launch Disk Drill and select your external storage device from the list. Click the Search for lost data button to begin scanning.
- Wait for the scan to complete. This may take some time depending on the size and speed of your device. Once the scan is complete, browse through the list of recoverable files.

- Use the preview feature to check if you’re recovering the correct files before you select them by clicking the checkboxes to the left of them.
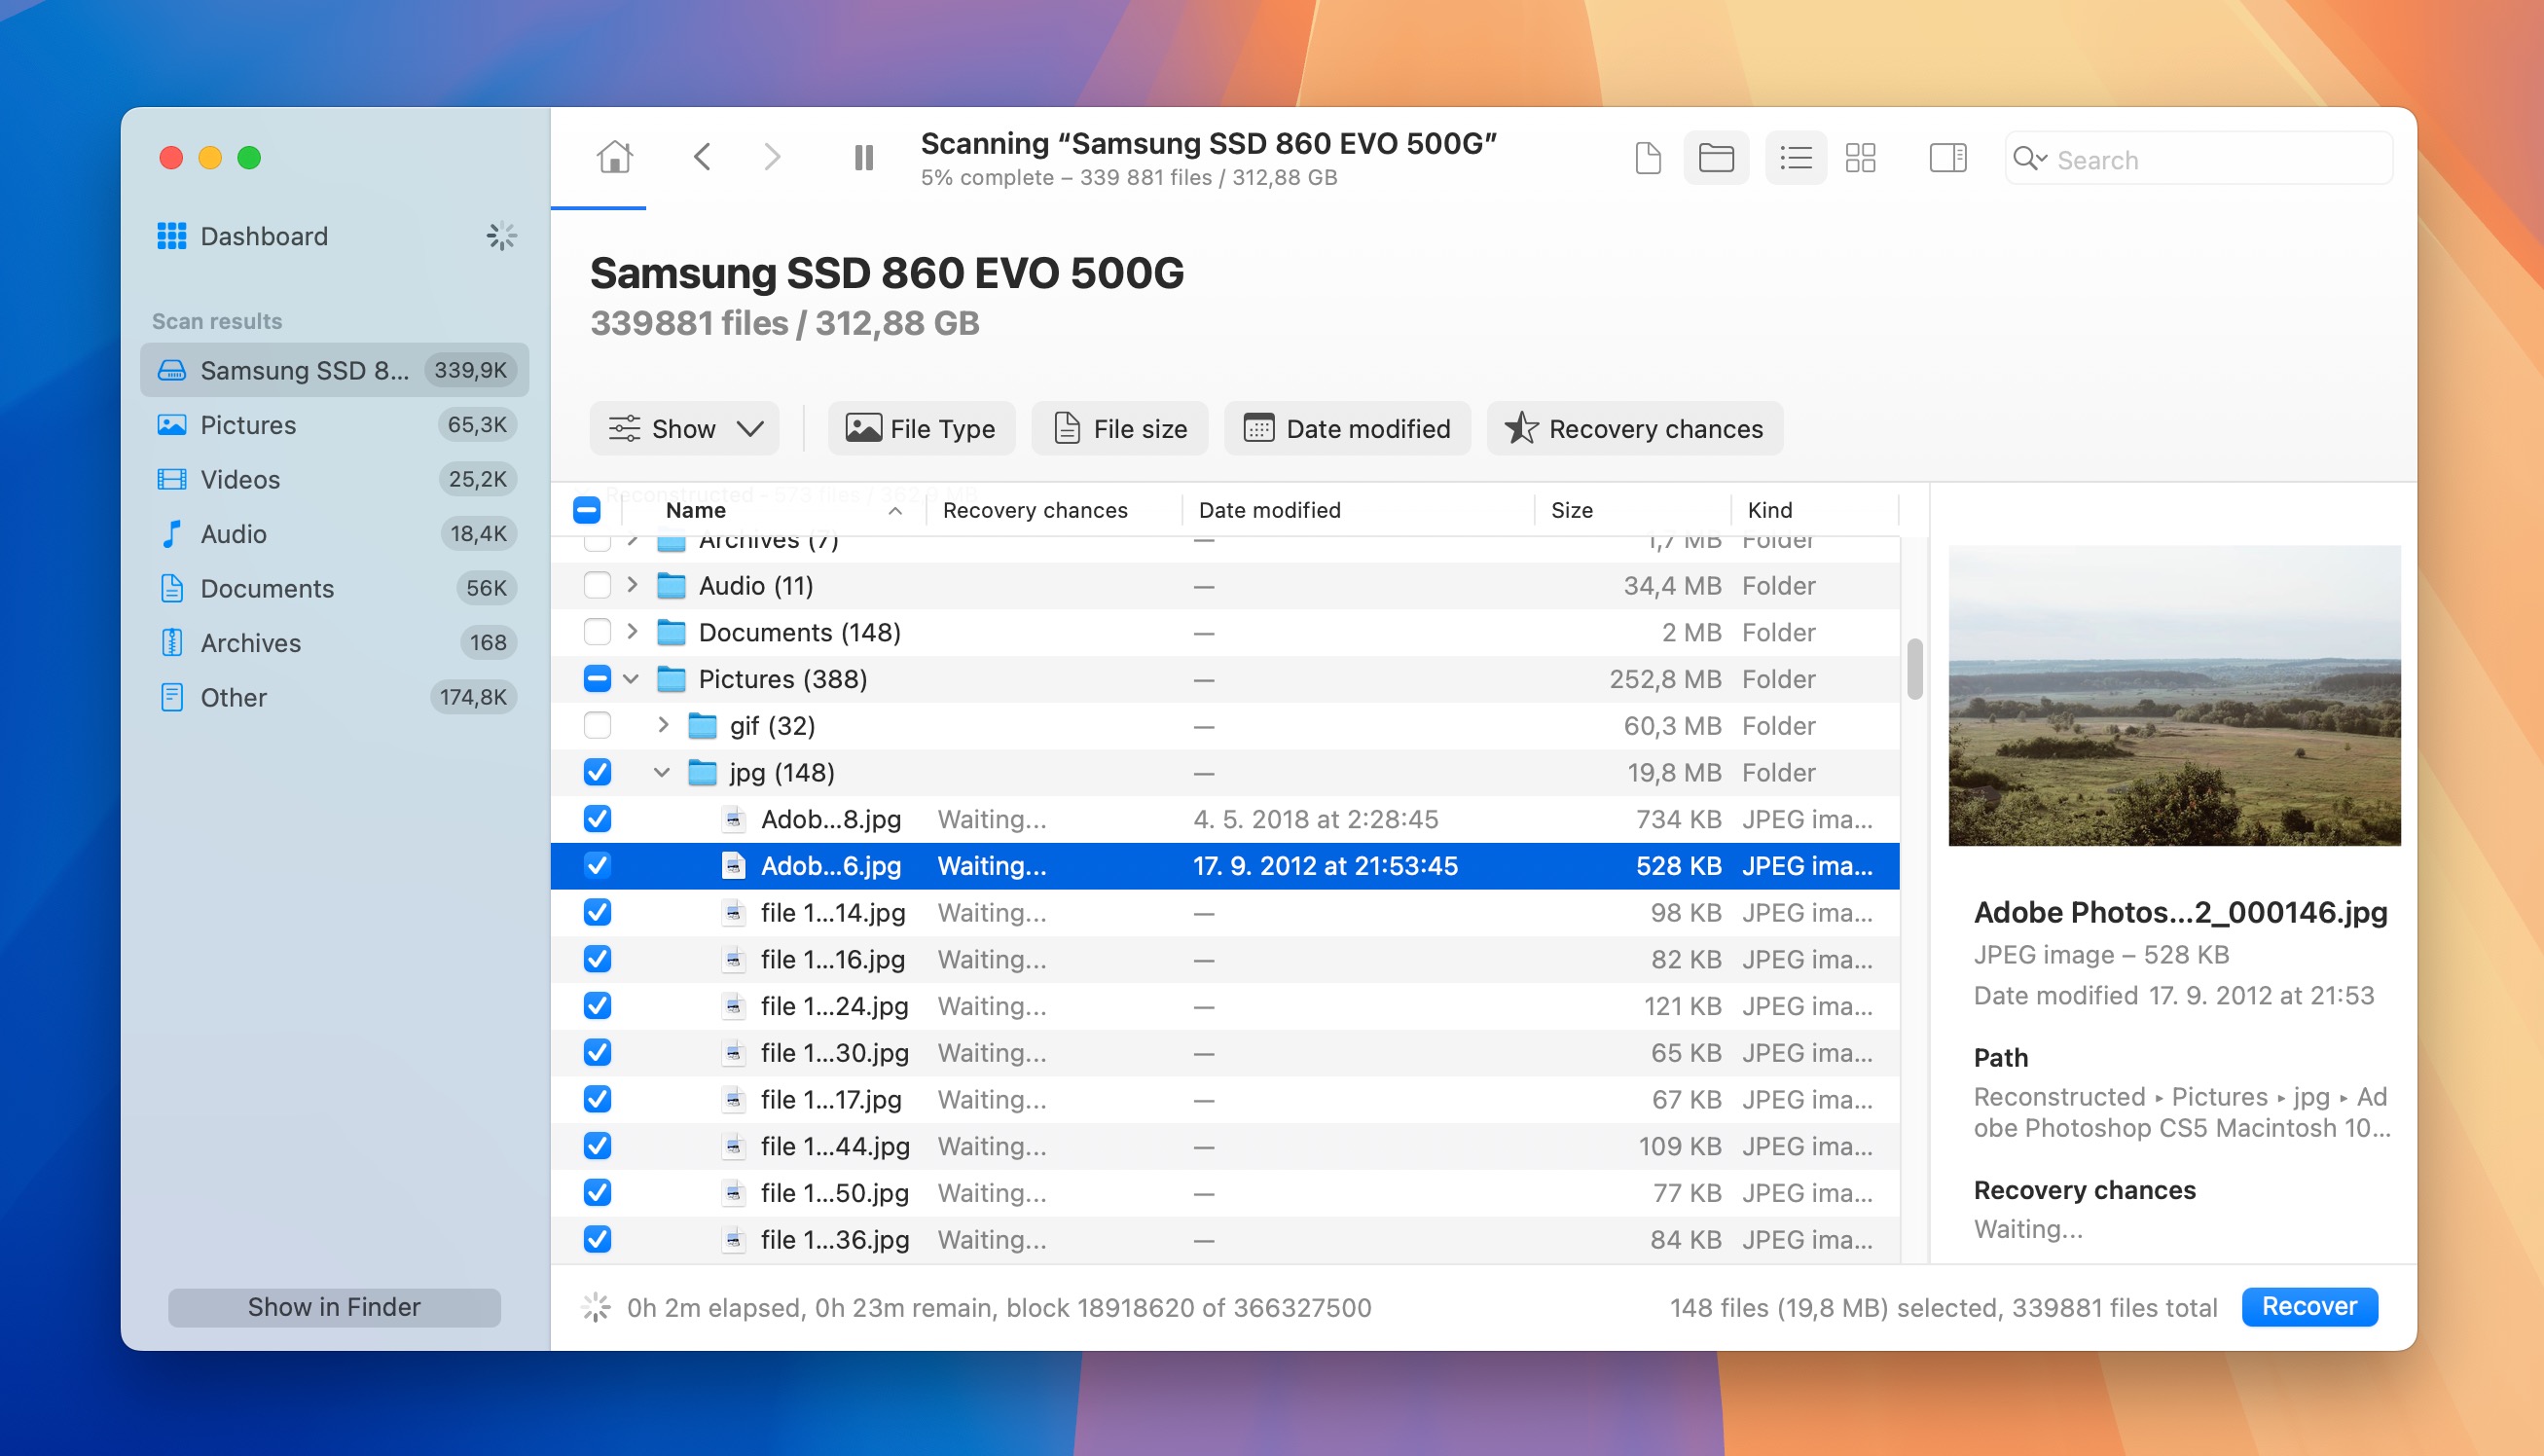
- Click the Recover button and choose a safe location to save the recovered files. Avoid saving them back to the same external device to prevent overwriting.
While Disk Drill is my go-to solution, there are other reputable data recovery software options available. One that’s completely free and highly effective is PhotoRec. Unlike Disk Drill, PhotoRec recovers files solely based on their file signatures (it doesn’t analyze file system information), so it can’t recover lost file names and paths, but that isn’t always important.
Solution 3: Recover Files from the Internal SSD
Recovering deleted files from your Chromebook’s internal SSD is more challenging for three main reasons:
- There’s no data recovery software for ChromeOS: Unlike Windows or macOS, ChromeOS doesn’t have any good native data recovery software options. Without data recovery software, there’s no way to recover permanently deleted files without removing the SSD, which brings me to the second reason.
- It’s difficult (or impossible) to remove an internal SSD: Chromebooks are designed with simplicity and security in mind, which often means limited user access to internal components. Many Chromebook models have their SSDs soldered directly to the motherboard, making removal impossible.
- Many Chromebooks come with TRIM-enabled SSDs: TRIM is a command that allows an operating system to inform an SSD which blocks of data are no longer in use. This improves the SSD’s performance but also makes data recovery nearly impossible once TRIM has been executed on the deleted files.
For these reasons, recovering files from your Chromebook’s internal SSD is often not feasible unless the file is still in Trash. The only problem is that there’s no guarantee that Trash is enabled on your machine, especially if it was set up by someone else, such as a school. You can check if Trash is enabled by opening the Chrome web browser and navigating to “chrome://flags”. There, look for the Enable Files Trash option. It should say Enabled.
If Trash is enabled, then this is how you can recover your files:
- Open the Files app on your Chromebook. You can find it in your app launcher or by clicking the Search button and typing Files.
- In the left sidebar of the Files app, look for and click on the Trash option.
- Browse through the Trash folder to locate your deleted file. Remember, files only remain here for 30 days after deletion.
- If you find the file you want to recover, right-click on it (or two-finger tap on the touchpad).
- From the context menu that appears, select Restore from trash. Alternatively, you can select the file and press Alt + Backspace on your keyboard.
The file will be restored to its original location. If you can’t find your file in the Trash, unfortunately, it may be permanently deleted from your Chromebook’s internal SSD. In such cases, your only other option when it comes to getting deleted files back on your Chromebook’s internal SSD are local backups.
If you’ve set up Linux on your Chromebook, then you might have also used the Linux Back up and restore feature to create a local backup. If so, then you can recover from it by following these steps:
- Click on the time in the bottom right corner of your screen and go to Settings > Advanced > Developers.
- Select Linux > Back up and restore.
- Next to Restore from a previous backup, click Restore.
- In the confirmation window, acknowledge that your current Linux apps and data will be deleted, then select the backup file you want to restore (it should be a .tini file).
- Wait for the restore process to complete.
That said, this method can only help you recover files that were stored in your Linux container, which is separate from your main ChromeOS file system. If that doesn’t help you, then you should check your usual local backup locations.
Conclusion
There are several ways to restore deleted files on Chromebook, but, as I explained in this article, their effectiveness depends entirely on where your files were stored. I hope that you’ve been able to follow my instructions without any problems and that your files are now recovered. If not, don’t hesitate to get in touch, and I’ll do what I can to help you.
This article was written by David Morelo, a Staff Writer at Handy Recovery Advisor. It was also verified for technical accuracy by Andrey Vasilyev, our editorial advisor.
Curious about our content creation process? Take a look at our Editor Guidelines.