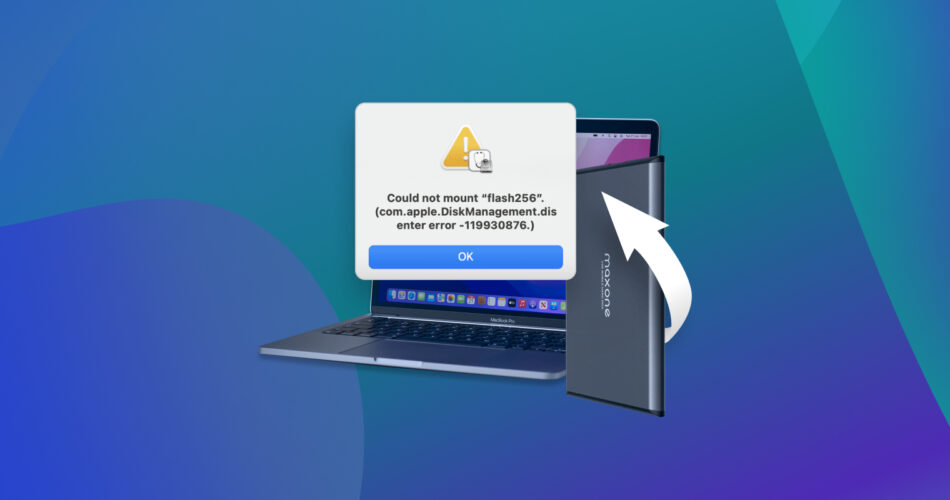
External hard drives are used for a variety of purposes. An external HDD or SSD gives you a great way of providing additional storage capacity to your Mac or MacBook. Sharing files with friends or colleagues is easy with an external drive. If you use Time Machine to back up your Mac, an external drive is almost a necessity.
It is very frustrating when you are faced with an external hard drive not mounting on your Mac. You might want to view a movie you’ve stored on the device or be getting ready to back up your Mac to the external drive. If the drive won’t mount, you can’t use it for anything.
We are going to show you multiple ways to fix the problem of a disk not mounting on your Mac. We’ll also take a look at an excellent software data recovery tool that can get your valuable data off an external hard drive that can’t be mounted.
Why Is My External Hard Drive Not Mounting on Mac?
There are several reasons why an external hard drive is not mounting on your Mac. The following table describes the most common problems and solutions when you are faced with a Mac external hard drive that is not mounting.
Reason |
Solution |
Improper connection |
Reconnect the drive or replace its cable. |
Insufficient power supplied to the external hard drive |
Verify the device is connected to a valid power supply. |
An external hard drive is hidden in Finder |
Update Finder settings to show external disks. |
An external hard drive suffers from logical corruption |
Format the drive and recover its data with data recovery software. |
An external hard drive is physically damaged |
The drive may have to be recovered by a professional data recovery service. |
How to Fix Mac External Hard Drive Not Mounting
Now, let’s look at the various methods you can use if your Mac’s external hard drive is not mounting. Some of them simply involve making sure everything is connected properly.
Method 1: Check the External Hard Drive’s Visibility and Connection
Several different measures can be taken to check the connectivity and visibility of an external hard drive that is not showing up when you plug it into a USB port.
Make sure that Finder is displaying external hard drives
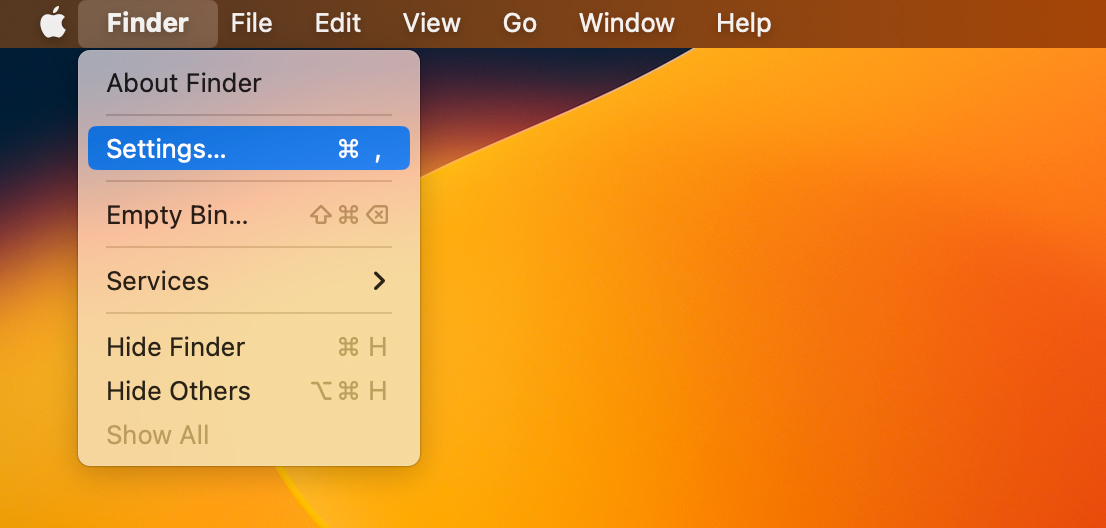
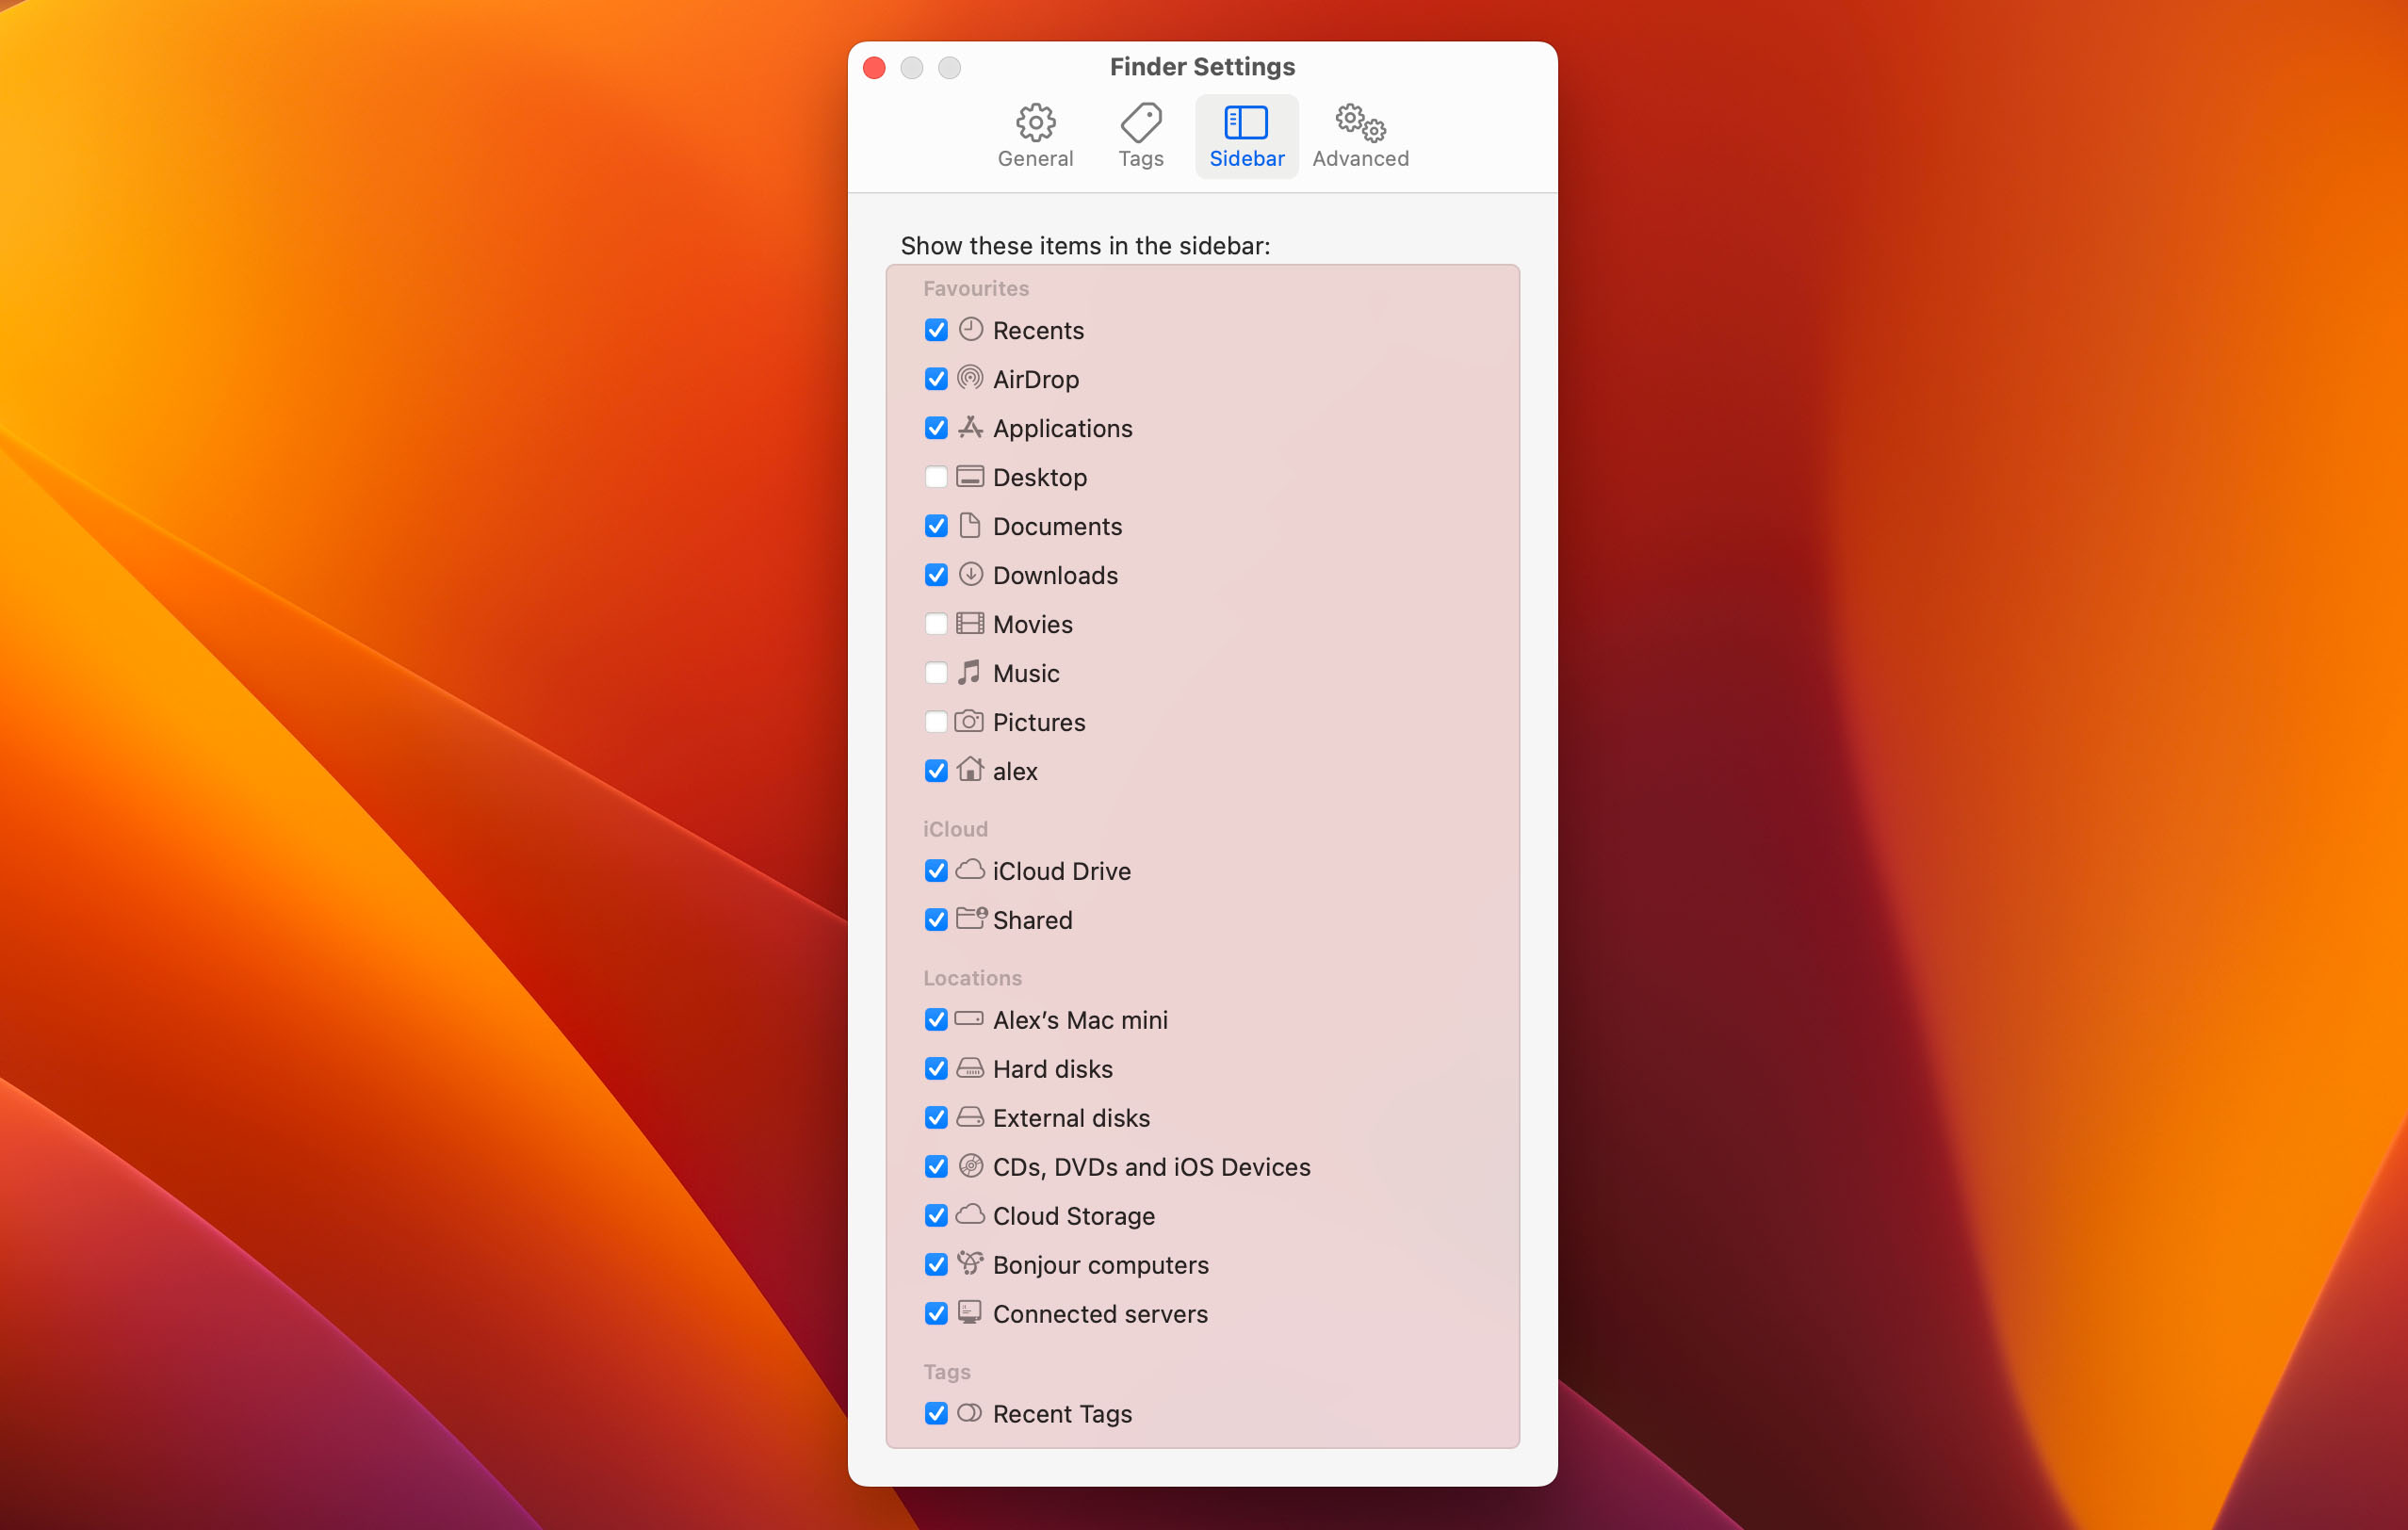
Use the following steps to verify that the Finder settings on your Mac allow external drives to be displayed on the desktop.
- Open a Finder window.
- Click on Finder in the Menu.
- Select Settings.
- Verify that the box is checked to the left of External disks.
Ensure the external hard drive is properly connected to the Mac
The problem may be that disk is not recognized because it is not properly connected to your computer or the cable is loose. Try unplugging the device and connecting it again to see if that resolves the issue.
Check all cables and ports
You may be dealing with a damaged cable or port. Visually inspect the cable for damage and replace it if necessary. If you have another cable available, try swapping it and try to connect the external hard drive again. If you are using an adapter to connect the drive, it also needs to be checked and verified that it is working correctly.
Connect to another USB port if one is available
If you have multiple USB ports available on your Mac, try connecting using a different one. It might be that the port is going bad or is having an issue with that particular cable.
Method 2: Use First Aid to Fix External Hard Drive Mounting Problems
The macOS Disk Utility application can be used to help you resolve many issues with your storage devices. The following steps may allow you to mount the external hard drive on your Mac.
- Open Disk Utility.
- Select the external hard drive that will not mount.
- Click the First Aid button at the top of the window.

- Click Run in the First Aid dialog box and follow the onscreen instructions.
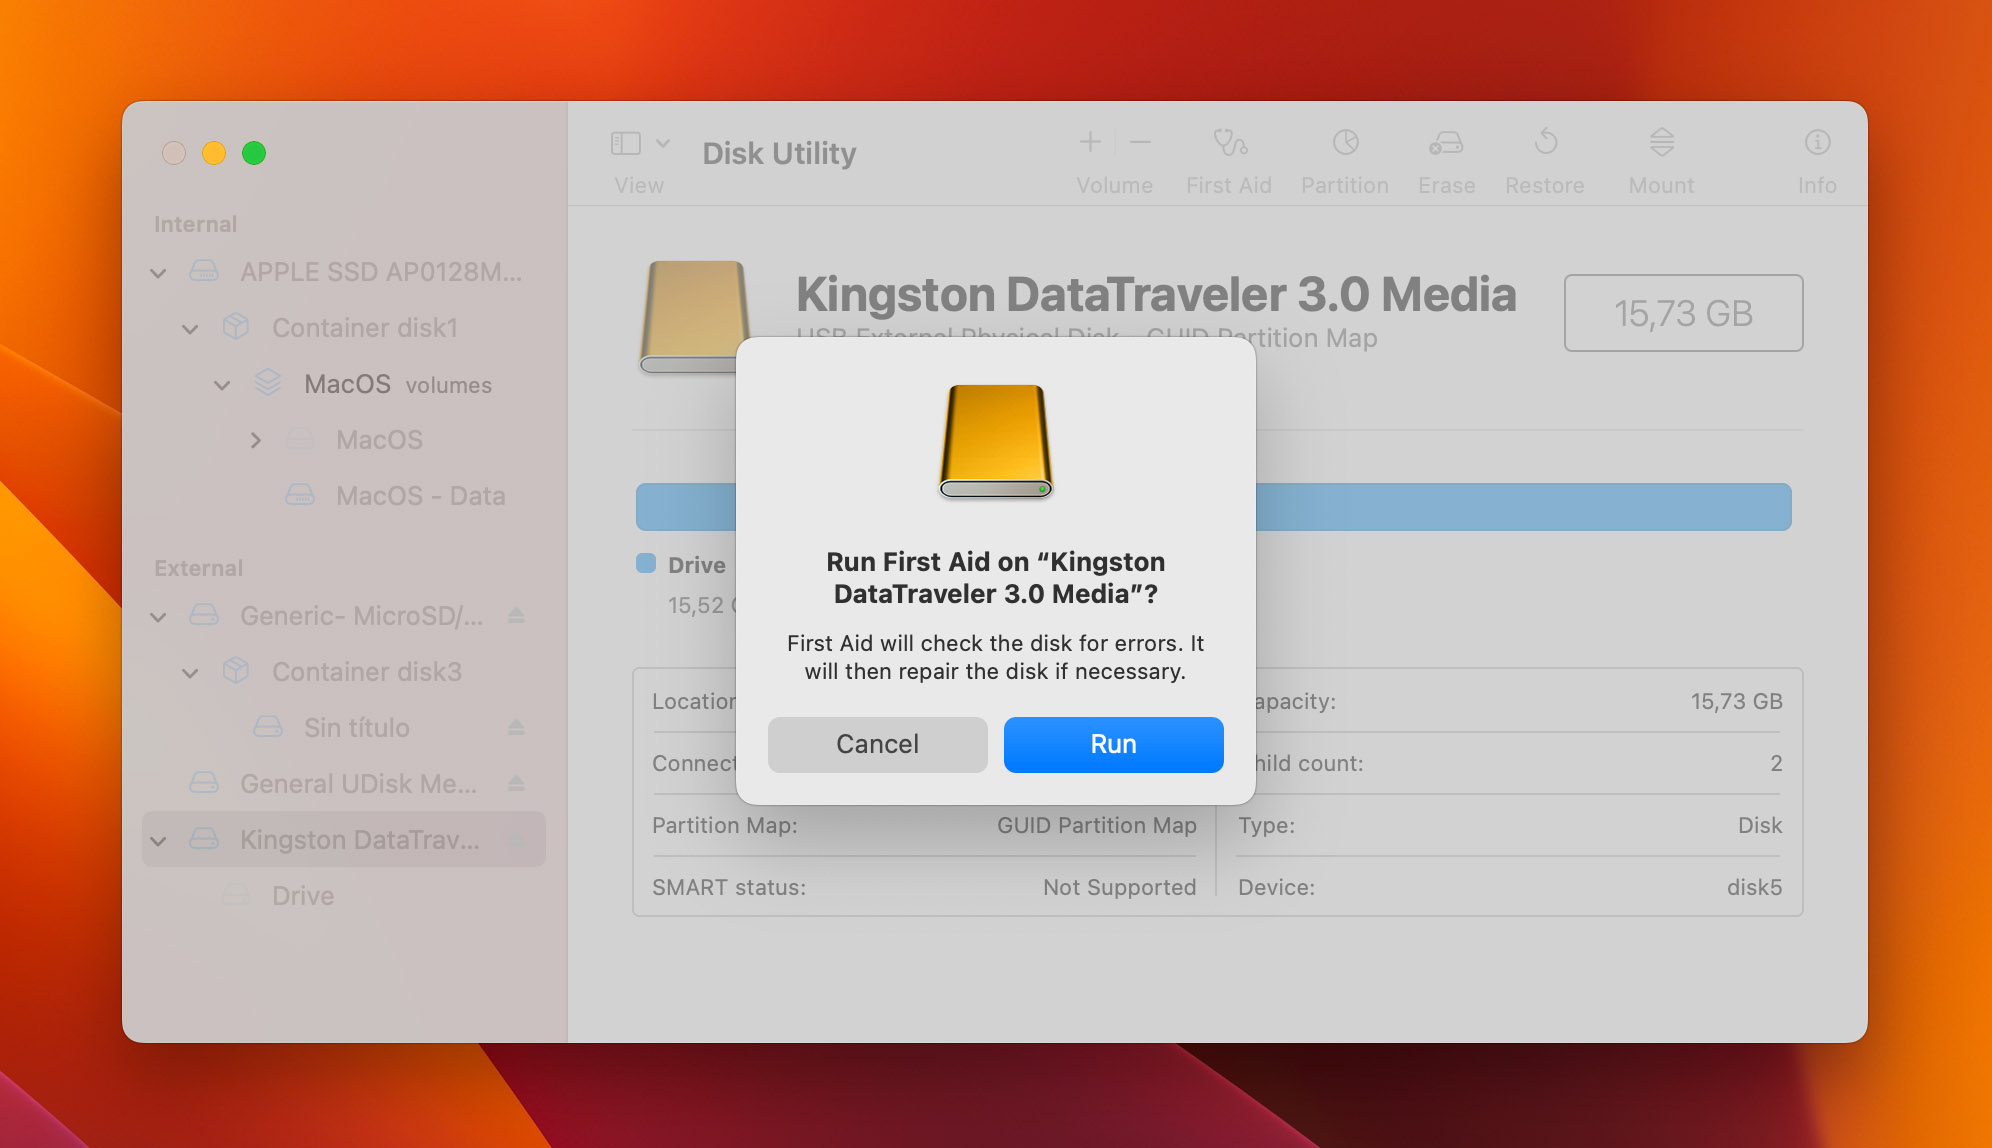
Disk Utility will inform you if the disk is OK or has been repaired. If it has, you can try to reconnect the drive and see if it mounts. If the disk cannot be repaired, you may need to try an alternate method of repairing the disk so it can be mounted.
Method 3: Reset the SMC and PRAM/NVRAM
In some cases where an external hard drive is not mounting on a Mac, it may be helpful to reset the PRAM/NVRAM and the SMC. You can do this with the following procedures.
You can only reset the PRAM/NVRAM on a Mac with an Intel processor. Use these steps:
- Shut down your Mac.
- Turn on your Mac and press and hold these four keys together: Option, Command, P, R.
- Release the keys after about 20 seconds, during which your Mac might appear to restart.
- When your Mac finishes starting up, adjust any system settings that were reset.
The steps to reset the SMC vary depending on if you have an Intel Processor, T2 chip, laptop, or desktop machine.
The methods involve powering off your Mac and restarting while pressing the Shift – Control – Option keystroke combination for laptops. For desktop machines, you need to unplug the power cord for 15 seconds before plugging it back in.
This Apple support page provides more details on the various steps to reset your SMC.
Method 4: Use Terminal to Fix External Hard Drive Mounting Issues
If you still cannot mount the external hard drive, you can try to fix the issue using the macOS Terminal app. We will look at two ways this can be done.
Repair File System Errors With FSCK
- Open the Terminal app and type: diskutil list then press Return.
- Enter:
sudo fsck_hfs -fy /dev/diskxxx
Replace diskxxx with the name of the disk in question and hfs with the appropriate file system.

The fsck command will scan the disk and attempt to repair any problems with the disk. When it completes, you should restart your Mac and try to connect the external hard drive again.
Mount the drive manually
You can always attempt to manually mount a drive in macOS. This method works on virtually every iteration of the OS through macOS Monterey.
- Open the terminal app and type:
diskutil mount /dev/diskxxx
Replace diskxxx with the name of the disk in question.

If all goes well, you will get a message verifying that the device is mounted.
Method 5: Format Your External Hard Drive
If all else fails, you may need to format your external hard drive to get it mounted on your Mac. We suggest that, if you can see the drive in Disk Utility but it will not mount, you retrieve its data before proceeding with the format. Use the Disk Drill recovery method described at the beginning of this article. You can also recover data after logically formatting the drive, but why take any chances with your valuable data?
Use the following procedure to format an external hard drive using Disk Utility.
- Connect the external drive to your Mac.
- Open Disk Utility.
- Choose View > Show All Devices.
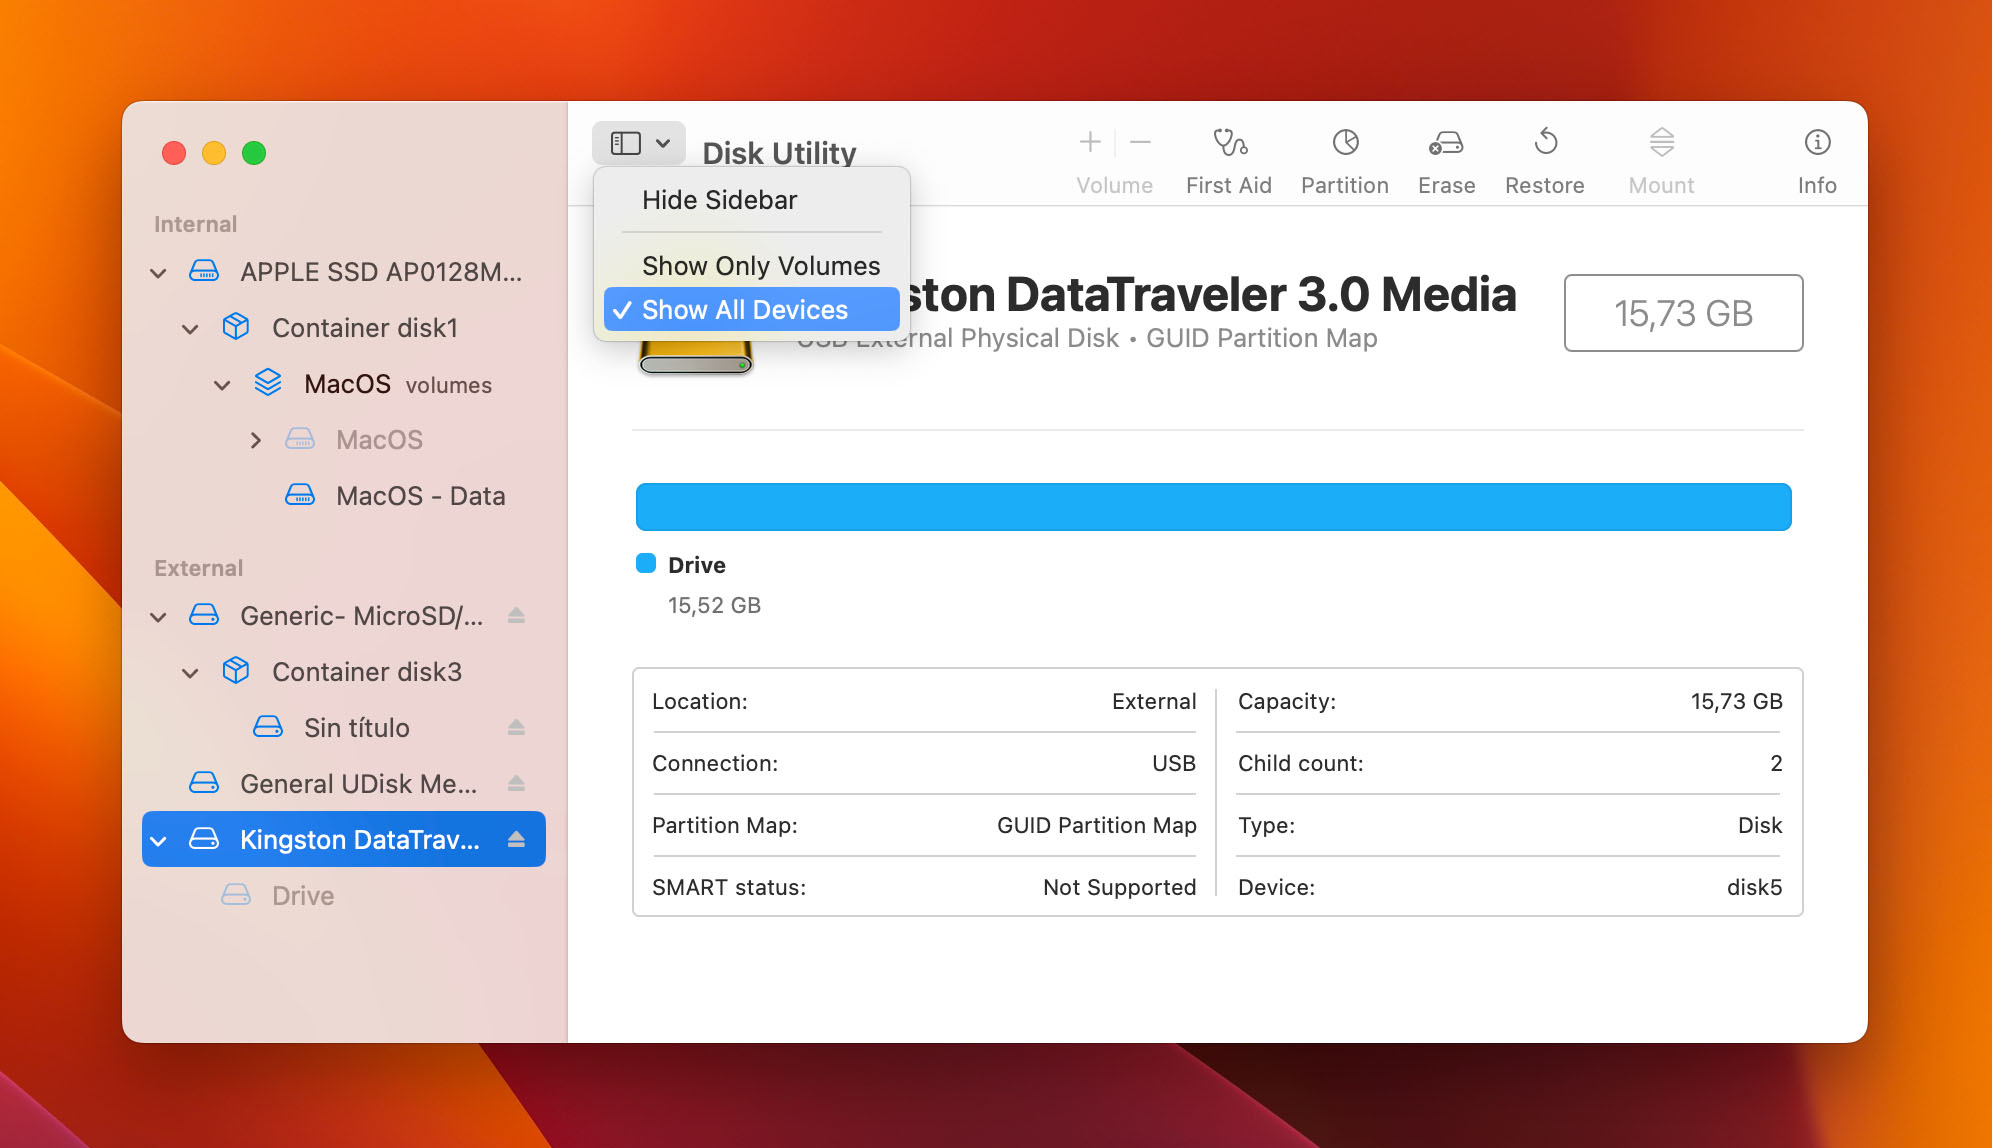
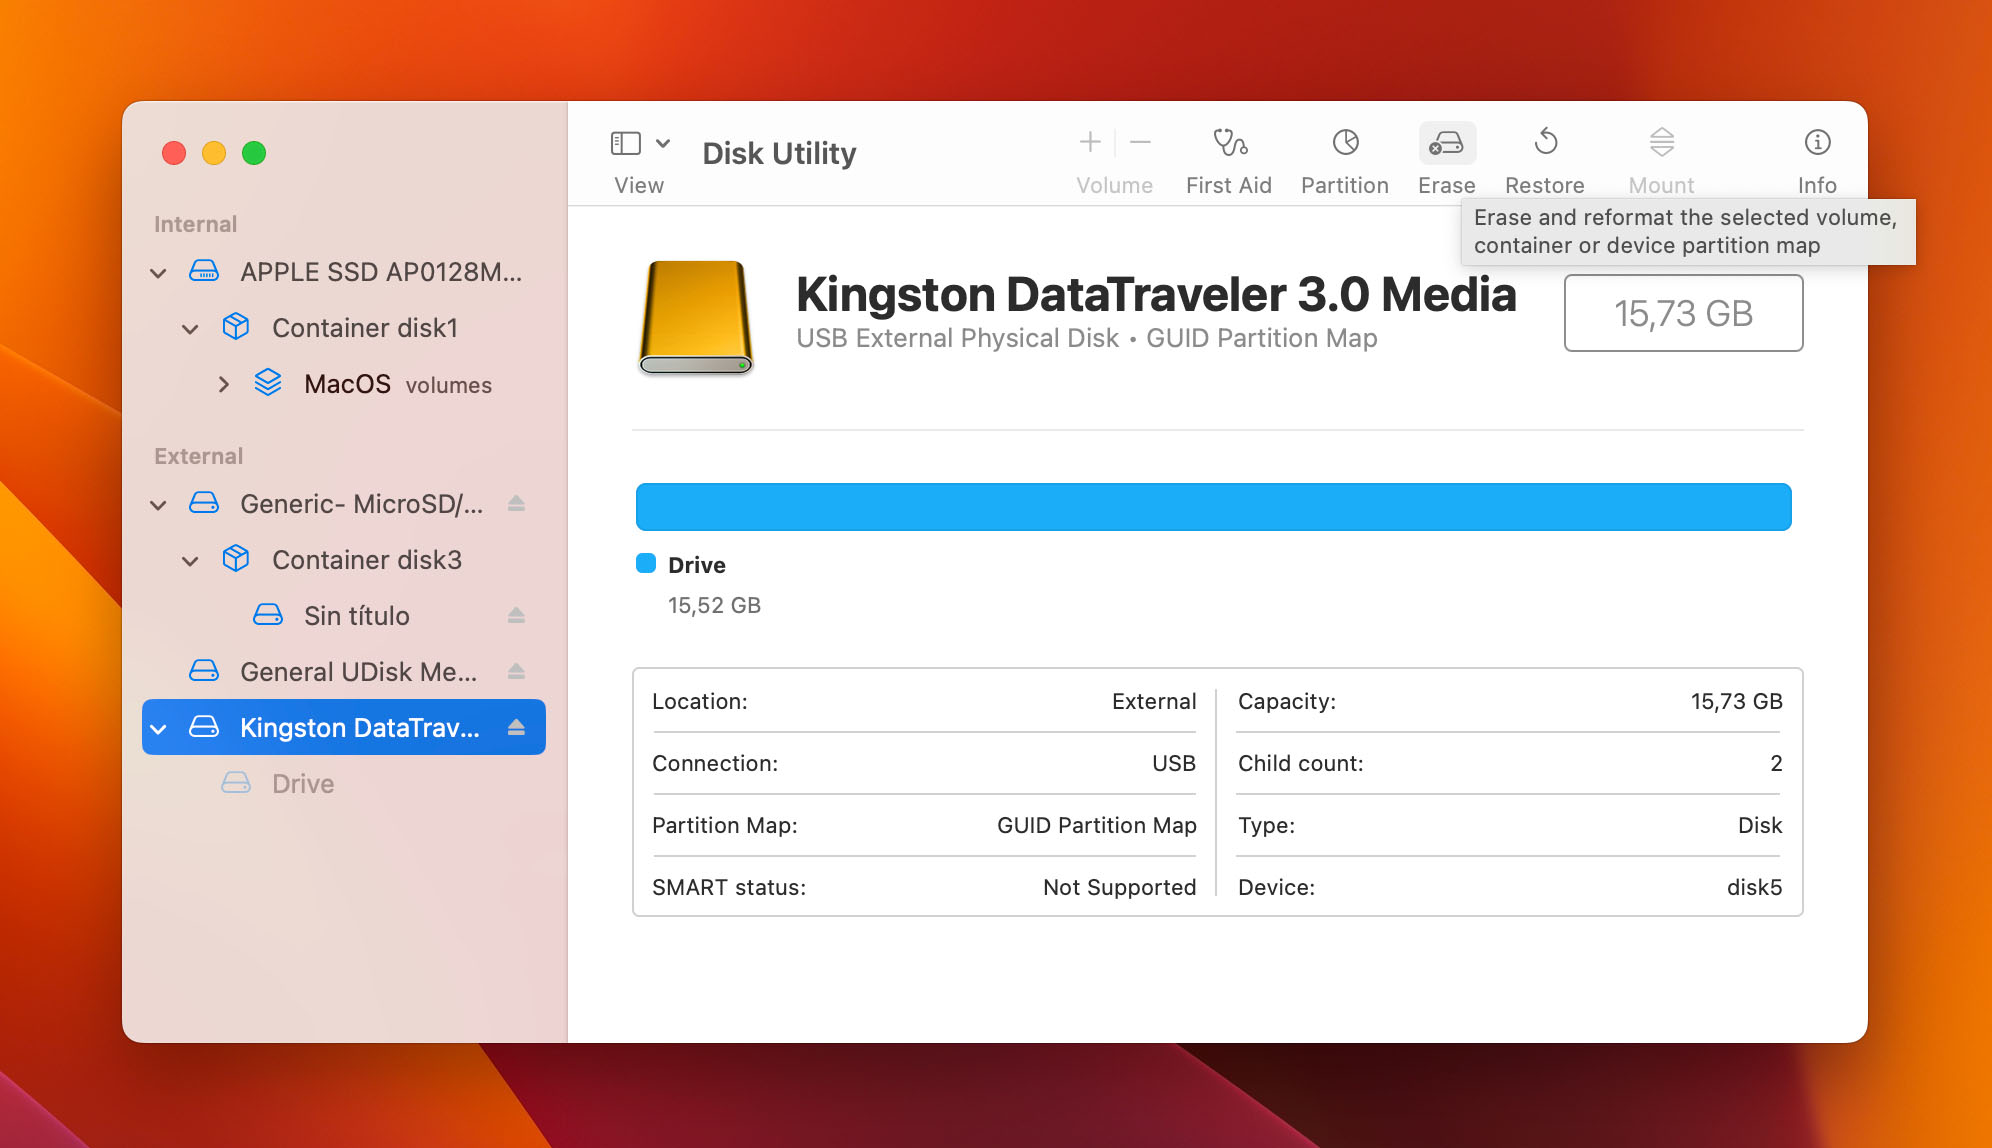
- In the sidebar, select the storage device you want to format.
- Click the Erase button.
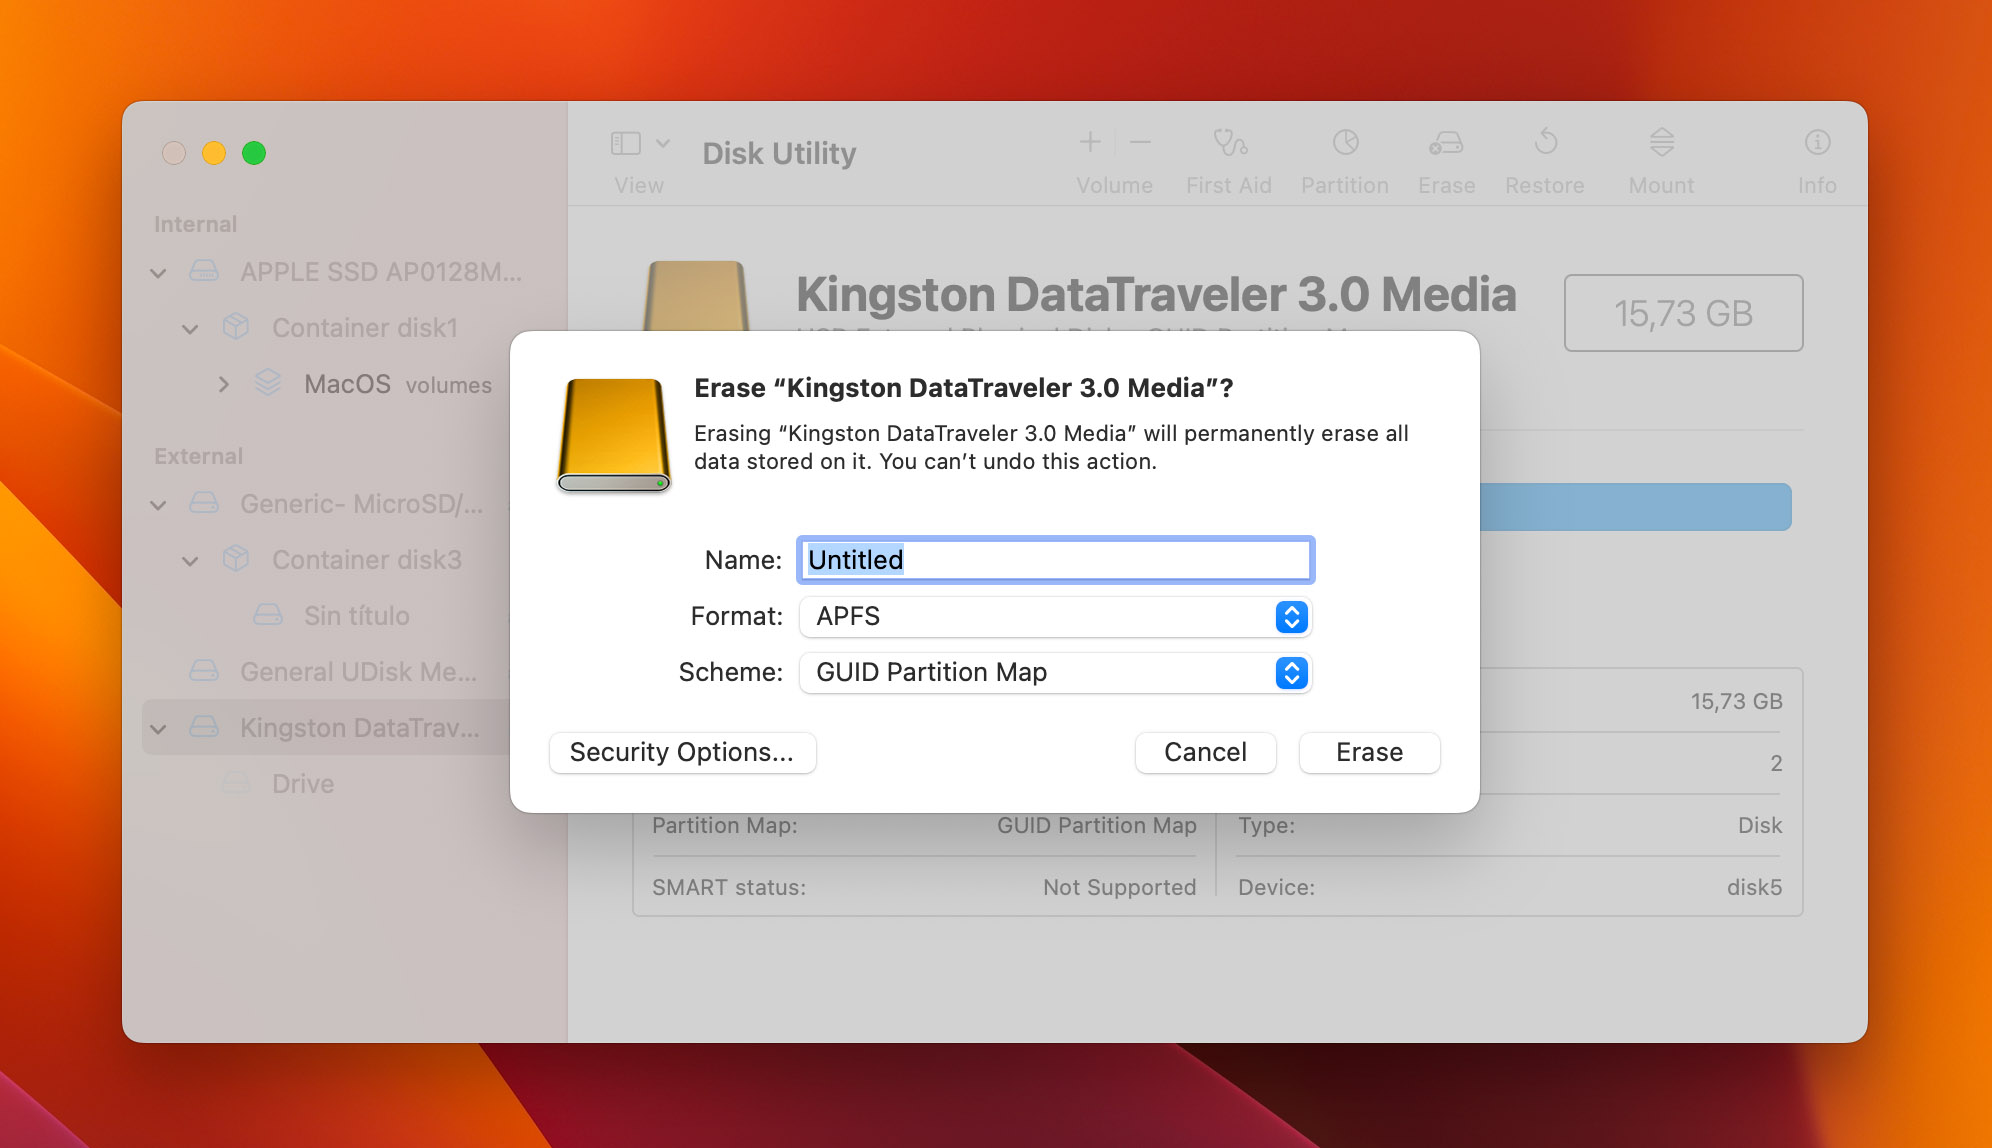
- Click the Scheme pop-up menu and select GUID Partition Map.
- Click the Format pop-up menu and choose a file format. You can select APFS, Mac OS Extended, or a Windows format like exFAT.
- Enter a name for the drive.
- Click Security Options, if available, to overwrite data for secure deletion. Don’t do this if you want to attempt data recovery after the formatting is complete.
- Click OK.
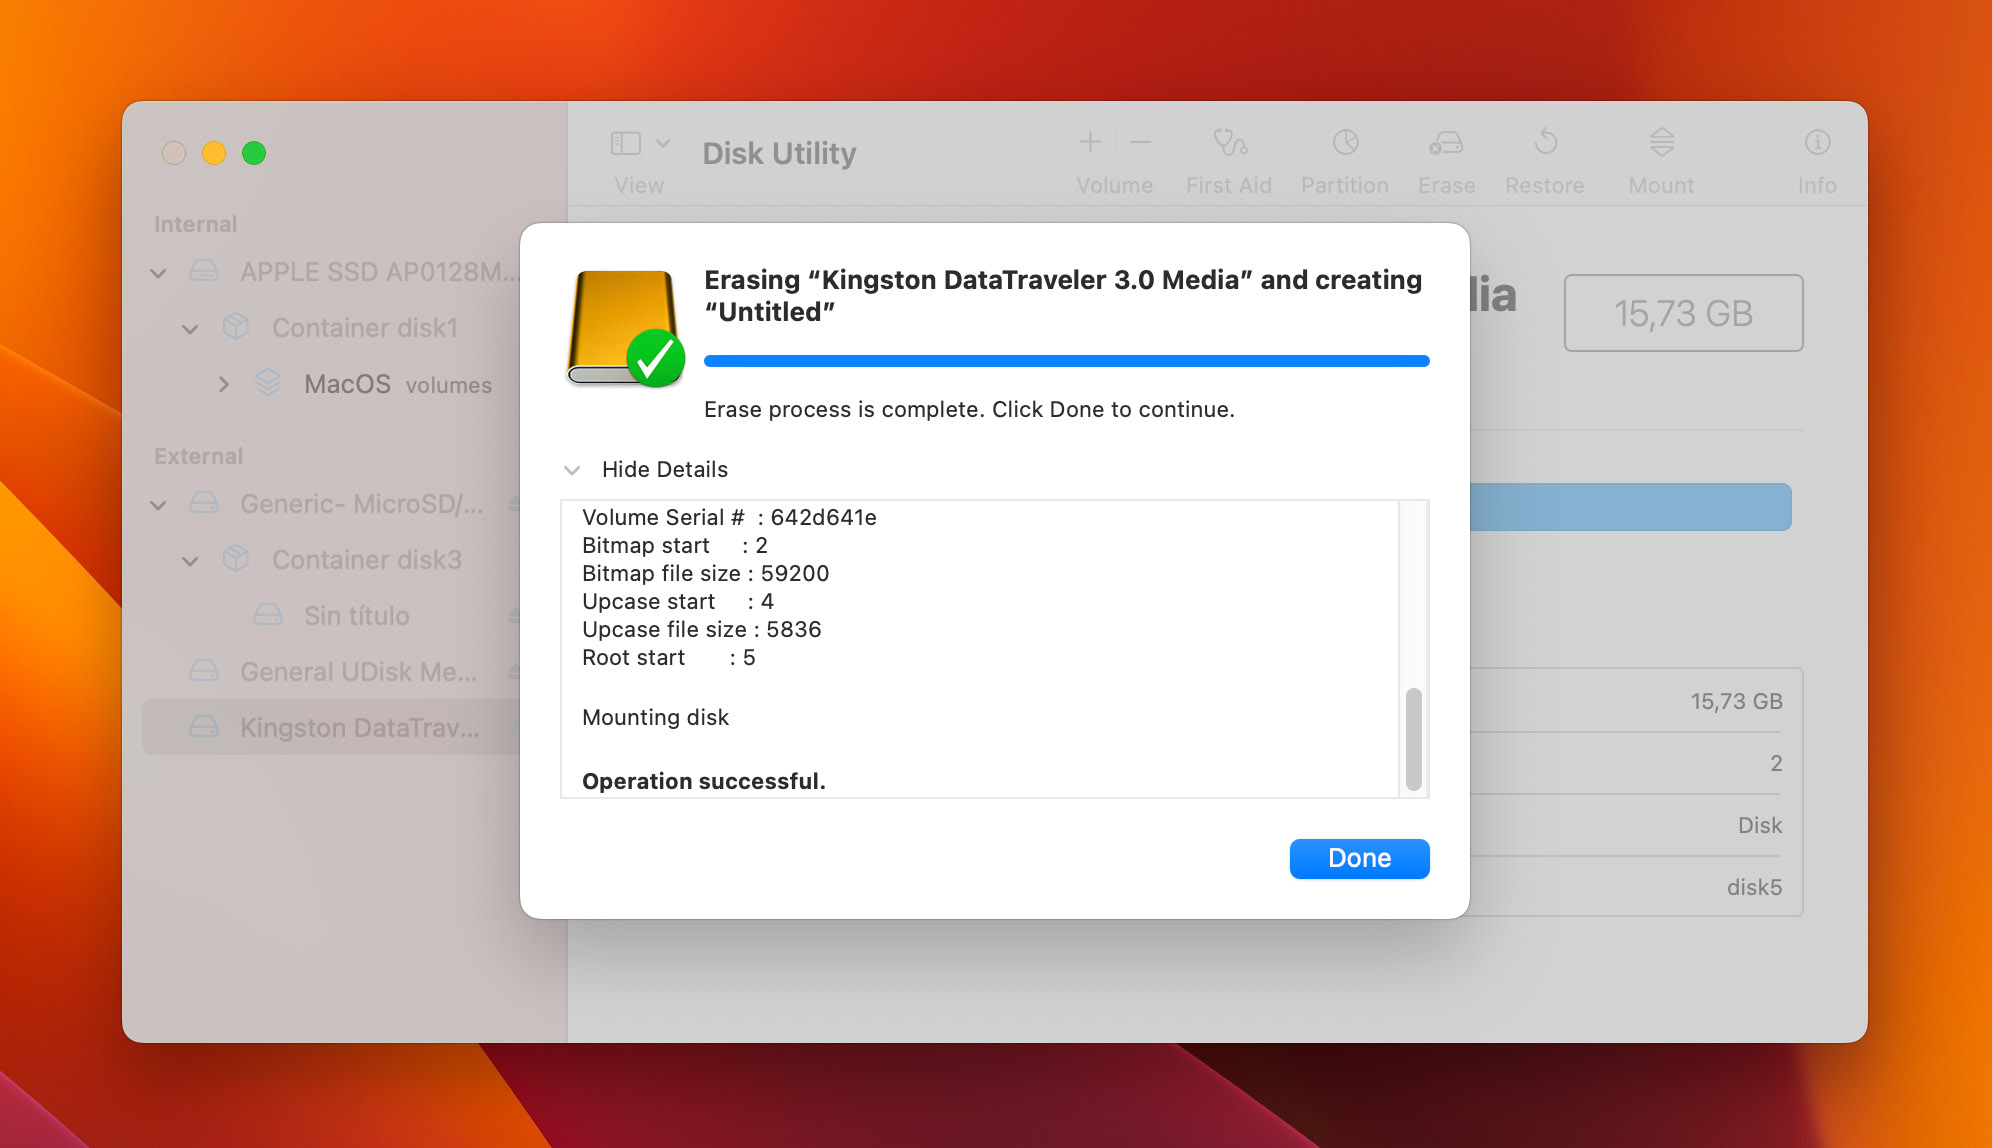
- Click Erase.
- Click Done.
How to Retrieve Data from an External Hard Drive that Won’t Mount on Mac
If your external hard drive won’t mount on your Mac, you can’t access any of its data. This can be a big problem as there might be unique and valuable files and folders on the drive that you need to retrieve. Fortunately, as long as the external hard drive is displayed in Disk Utility with its correct size, you can use data recovery software to retrieve its data.
Using data recovery software is the safest method of retrieving the information on the external hard drive. Other methods of mounting the drive may entail data loss so it’s a good idea to retrieve your files before going forward.
Disk Drill is a comprehensive data recovery software solution. The tool supports data recovery on virtually any type of disk-based storage device, including external hard drives like WD My Passport and equipment from manufacturers like LaCie, SanDisk, and Seagate. Disk Drill also supports recovery regardless of connection type, enabling you to retrieve data from an older FireWire hard drive.
Disk Drill’s user-friendly interface and advanced scanning algorithms make it an excellent data recovery tool for an experienced or novice Mac user. All it takes is a few clicks to start recovering data. Disk Drill supports the recovery of hundreds of different file formats including all the popular ones you typically find on a Mac. The software also provides free data management and protection features such as the ability to create byte-level backups to recover data from a failing hard drive.
Use the following procedure to recover data from an external hard drive that is visible in Disk Utility, but will not mount on your Mac.
- Connect the external drive to your Mac and verify that it is displayed in Disk Utility.
- Download Disk Drill for Mac and install it on your machine.

- Launch Disk Drill and select the external hard drive from the available devices.
- Click the Search for lost data button to start scanning the device for recoverable files.

- Review the found files and select those you want to recover.
- Click the Recover button and choose a safe storage location for the recovered data that is not on the original device.
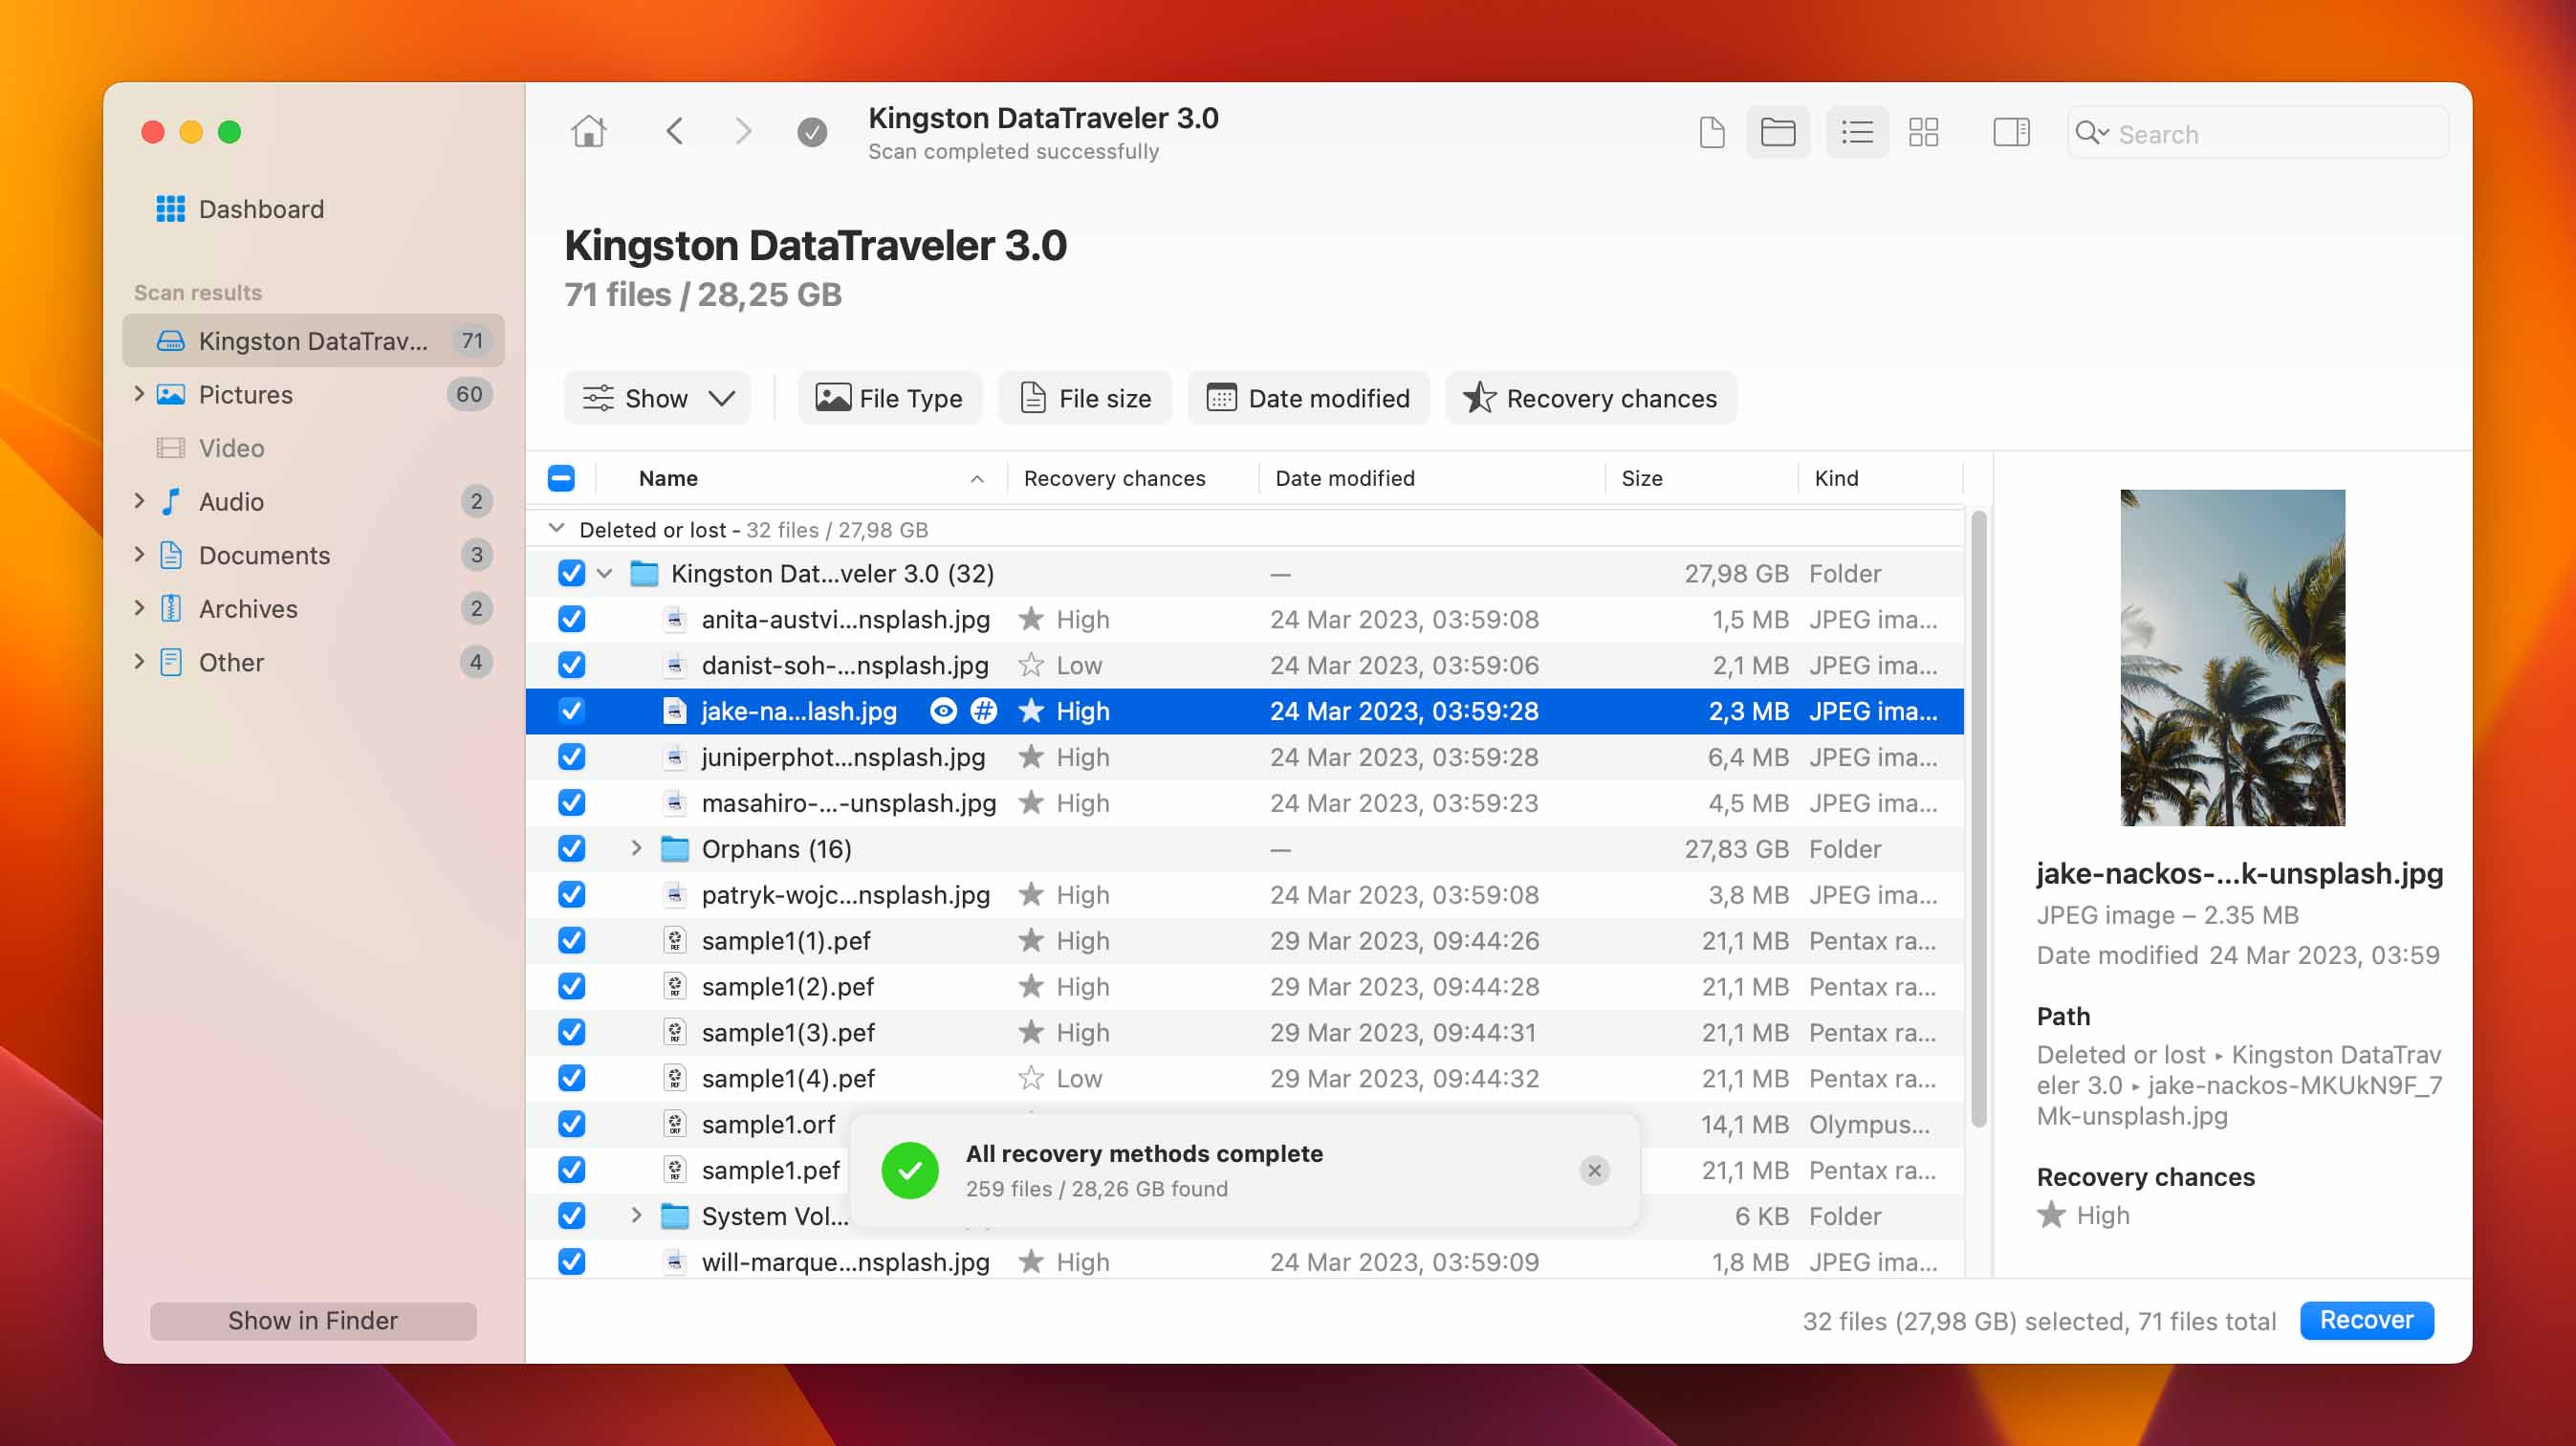
- Click Next and let Disk Drill recover your files and folders.

FAQ
Why does my internal hard drive not mount on Mac?
An internal disk that will not mount may indicate a corrupt or damaged disk. You should attempt to repair the disk with Disk Utility and First Aid. You may have to format the drive to resolve the problem.
How do I fix a LaCie hard drive not mounting on Mac?
You can try the following methods for fixing a LaCie hard drive when the volume is not mounting.
- Check the cables and connections.
- Use First Aid to repair the drive.
- Reset your Mac’s SMC of NVRAM.
- Format the drive.
How can I fix a Seagate external hard drive not mounting on Mac?
You can attempt to fix a Seagate external hard drive not mounting on your Mac by checking its cables and connections. You may need a new cable or USB to Lightning adapter to successfully mount your hard drive.
How do I force mount an external hard drive on Mac using Terminal?
Use the following steps to force mount an external hard drive on Mac with Terminal.
- Connect the external hard drive to your Mac.
- Launch Terminal.
- Enter: sudo mkdir /Volume/xxx where xxx is your disk name.
- Enter: sudo mount -t hfs /dev/diskyyy /Volumes/xxx where diskyyy is your disk number and xxx is your disk name.
How can I fix a Seagate external hard drive not mounting on Mac?
Try the following solutions to mount the external hard drive on Mac containing your Time Machine backups.
- Disconnect and reconnect the cable.
- Replace the cable if it appears to be damaged.
- Ensure Finder shows external disks.
- Try connecting using a different USB port.
Why won’t my external SSD mount on Mac?
The most common reason an external solid-state disk is not mounting on a Mac is a bad cable connection. This may be due to a worn or damaged cable. The problem can also be caused by a faulty USB port. Try replacing the cable and using an alternate port to mount the SSD.
Conclusion
Don’t panic if your external hard drive is not mounting on your Mac. We’ve shown you multiple methods of getting it to mount, and hopefully one of them works and your drive gets mounted. We’ve also discussed how Disk Drill data recovery software can retrieve data from the drive if you can’t get it to mount as long as Disk Utility can see the device. With the information we have provided, you should be able to avoid data loss either by mounting the drive or recovering its data. Good luck!
This article was written by Robert Agar, a Staff Writer at Handy Recovery Advisor. It was also verified for technical accuracy by Andrey Vasilyev, our editorial advisor.
Curious about our content creation process? Take a look at our Editor Guidelines.
